Part 2 - Creating Equipment model in Engineering UI
This article is part of the Batch Job example
Now that we have defined Equipment type hierarchy, properties and instances, we can configure these with the Engineering UI web application. If you need reminder of how to connect, please see Engineering UI .
Getting started
Equipment Classes and properties
After finishing our model definitions, we will configure these in our Equipment Classes menu. This is where we can create and modify our equipment model and properties.
We create our Equipment Model by choosing edit and new on the Equipment classes window and configuring our Equipment Model settings as needed. These include e.g. name, possible base and if the model is abstract or not.
After creating a new class, we start creating properties in the properties list on the right side of the display. We can do this again with the edit and new buttons.
When creating properties and defining attributes a few things to keep in mind:
-
Data type: Choose data type carefully to avoid changing it later. changing types within process may create errors in the system that prevents property definitions in the code.
-
Reference properties: When creating GUID properties referring to other classes, the class name need to be defined in Reference target column. In our example Reference target for Mixer would be Class:Path_Mixer as showed in the tables on part 1.
-
Target history settings may differ depending on property type. In our example we choose CurrentHistory for our properties as we set current values for each and values will be updated every batch.
StreamHistory supports maintenance of the history values, but it is optimized for write once and read frequently type of use. CurrentHistory is optimized for frequently updated history values, i.e. why it is better for calculated values as well as aggregated values that typically need to be recalculated.
Further information: Time Series Concepts > History Tables.
-
Compression Method: If equipment properties are being used in calculations, it is strongly advised to use No compression. Further information: Calculations > Concepts.
-
Discrete value: This is an advanced setting found in Properties menu on Equipment Classes window (click property active, open properties menu from top right corner and press + sign. Discrete Value should show under General). Equipment property should be defined as discrete and not linear, when calculated value presents a time period, such as 30 minute average. Some values differ from this of course, such as temperature or power. Please see further information: Calculations > Concepts.
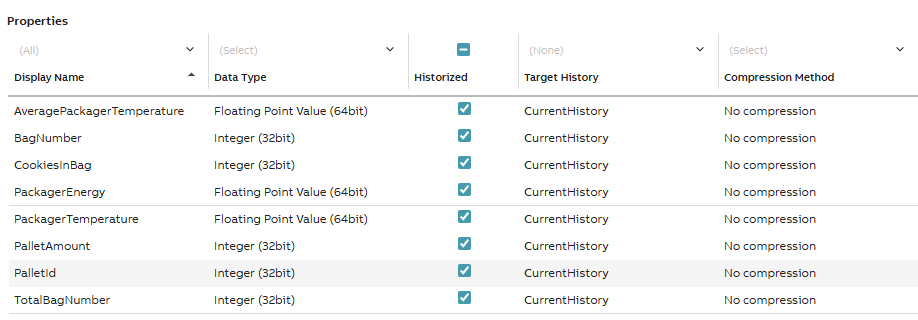
Cookie.Packager class property examples
Equipment Instances
As discussed in part 1, after creating and defining properties, we will create our instances. In Engineering UI main menu we choose Information Model > Equipment List. Creating and modifying works similarly as with properties. Remember to commit changes to save them.
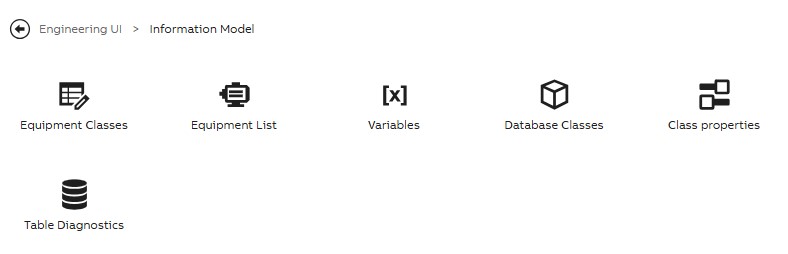
Information model menu
Creating instances correctly requires at least the following information:
- Name (e.g. Mixer)
- Parent (e.g. DemoFactory.ChocolateCookieLine1)
- Process Path (e.g. DemoFactory.ChocolateCookieLine1.Mixer)
- Equipment model (e.g. Mixer)
The logic of our monitoring system is created in the code, so the values for properties will be created in the next part (part 3 - Calculations).
Please note that if you have GUID properties, add their process path in the instances table as well. If tied correctly when configuring property settings, our system will automatically suggest the right path for you. Remember to commit changes before closing edit more. Examples are shown in two pictures below.
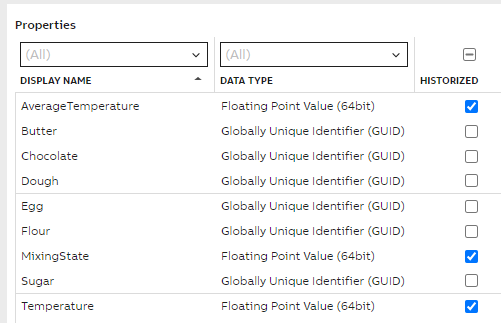
Example of Mixer GUID properties

Example of paths on Mixer instance settings
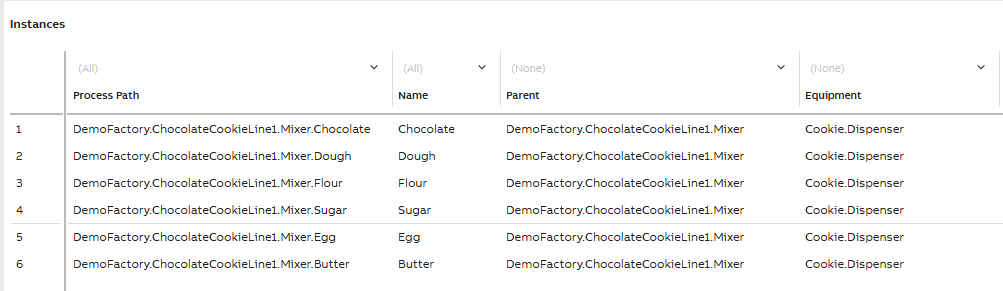
For our Dispenser class we have defined our raw material instances as picture below shows. We have defined the Equipment to be our Cookie.Dispenser model, but the parent of each instance is our Mixer. This way, in our calculations, we are able to access these raw materials (and their properties) through our Mixer instance.
Remember to Commit changes before closing edit mode.
Now that we have successfully created Equipment models and instances, we can move on to our calculation tool that may be found under Calculations > Catalog.
More information on Equipment model?See theory and other example case: Equipment model
Creating Equipment Model in Engineering UI: Equipment Model tutorial.
Updated 4 months ago