Part 1 - Calculation using variables
In this first part of the tutorial, we will create a calculation that sums up the time series data from two variables. The result is then written to a third variable.
The variables
From the left side navigation, under Information Model, open the Variables view. In this view you should see three variables called CalcTutorial_A, CalcTutorial_B, and CalcTutorial_C:
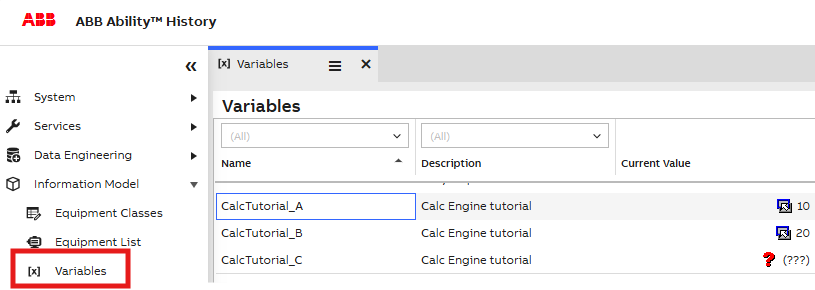
Our aim is to create a calculation that sums up CalcTutorial_A and CalcTutorial_B and writes the result into CalcTutorial_C.
You may notice that currently the values of CalcTutorial_A and CalcTutorial_B are 10 and 20, respectively, and the value of CalcTutorial_C is 0. After you complete this part, the value of CalcTutorial_C will automatically update to 30, which is the sum of CalcTutorial_A (10) and CalcTutorial_B (20). Afterward, any changes to CalcTutorial_A and CalcTutorial_B will also automatically change the value of CalcTutorial_C.
Creating a new calculation
To create a new calculation, open up the Calculation Tool view from the left side navigation under Calculations > Catalog:

Click Add Calculation button to open up the calculation creation dialog. On the top left, fill in the following information:
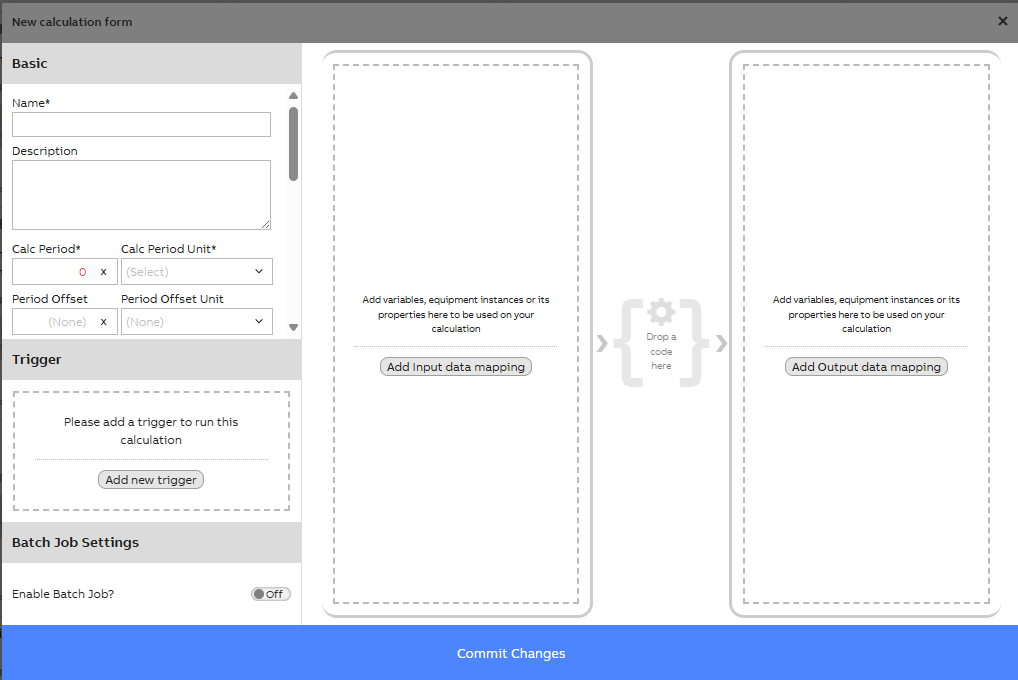
- Name: "ExampleSum"
- Group:
\RTDB-CalcUser - Calc Period and Calc Period Unit: 1 Seconds
Defining data mappings
Next, we will select the time series we want to use in the calculation.
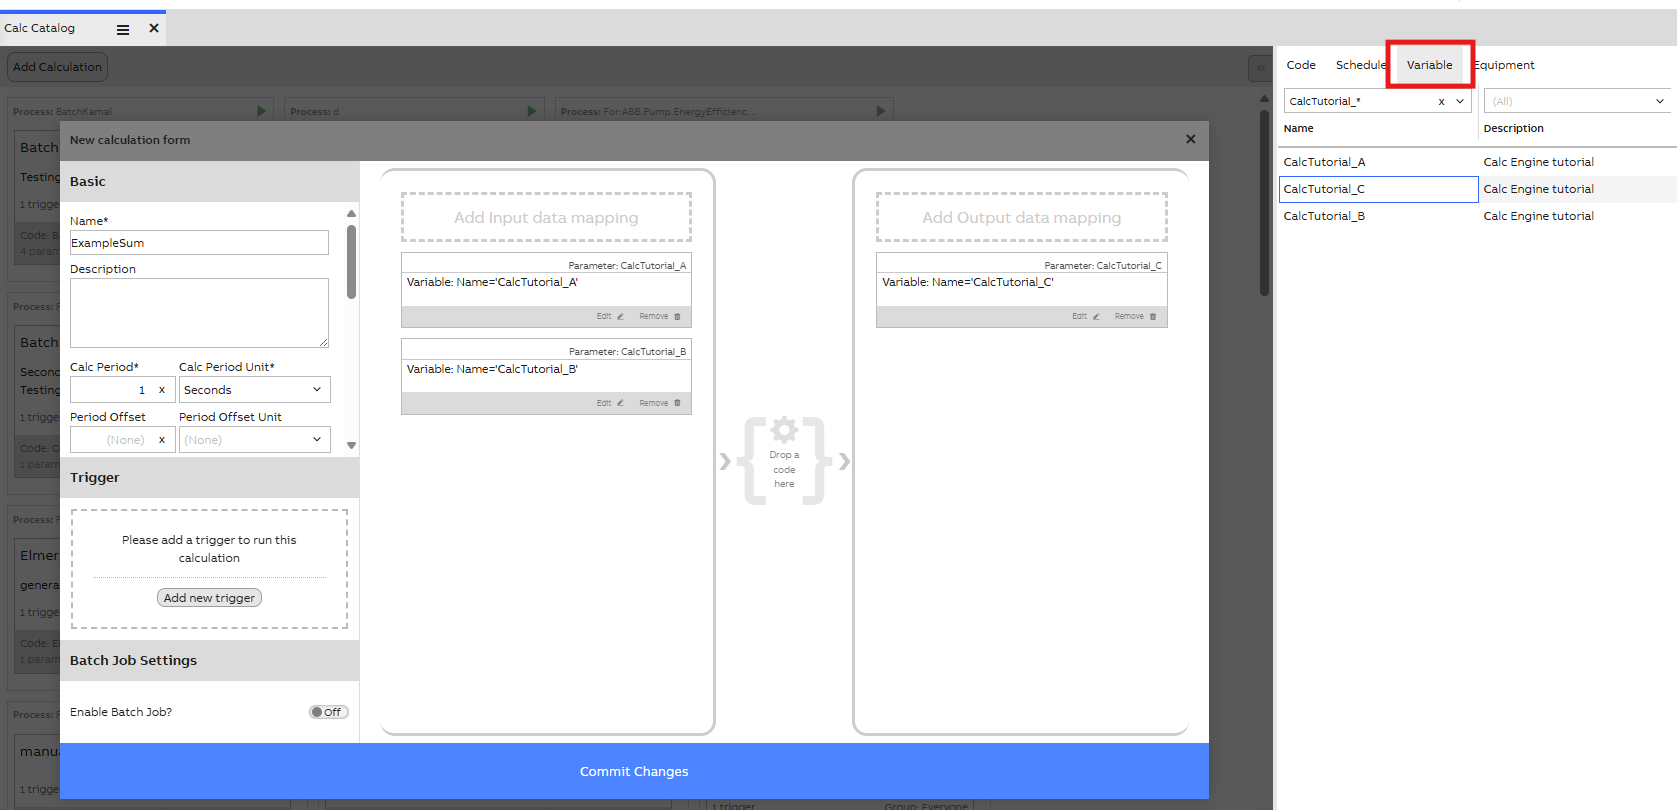
On the right side, choose a tab named Variable. Type "CalcTutorial*" in the field above the Name column and press enter. This will filter the table to show only the variables we need.
Next, drag CalcTutorial_A to the Add Input data mapping area. Now do the same also for CalcTutorial_B.
Next, drag CalcTutorial_C to the Add Output data mapping area. Finally, close the dialog by clicking the Done button. Now you should see a visual representation of the data mappings for your calculation:
Note that if at any moment the mapped variable is deleted or renamed, we need to check the calculation afterwards and remap.
Create the calculation code
Next, we’ll add the code to your calculation. Click Drop a code here to open the code selection form. From there, you can either select an existing code or create a new one. As you can see, the parameters are already mapped — you’ll just need to choose a name(ExampleSum) and group(\RTDB-CalcUser).
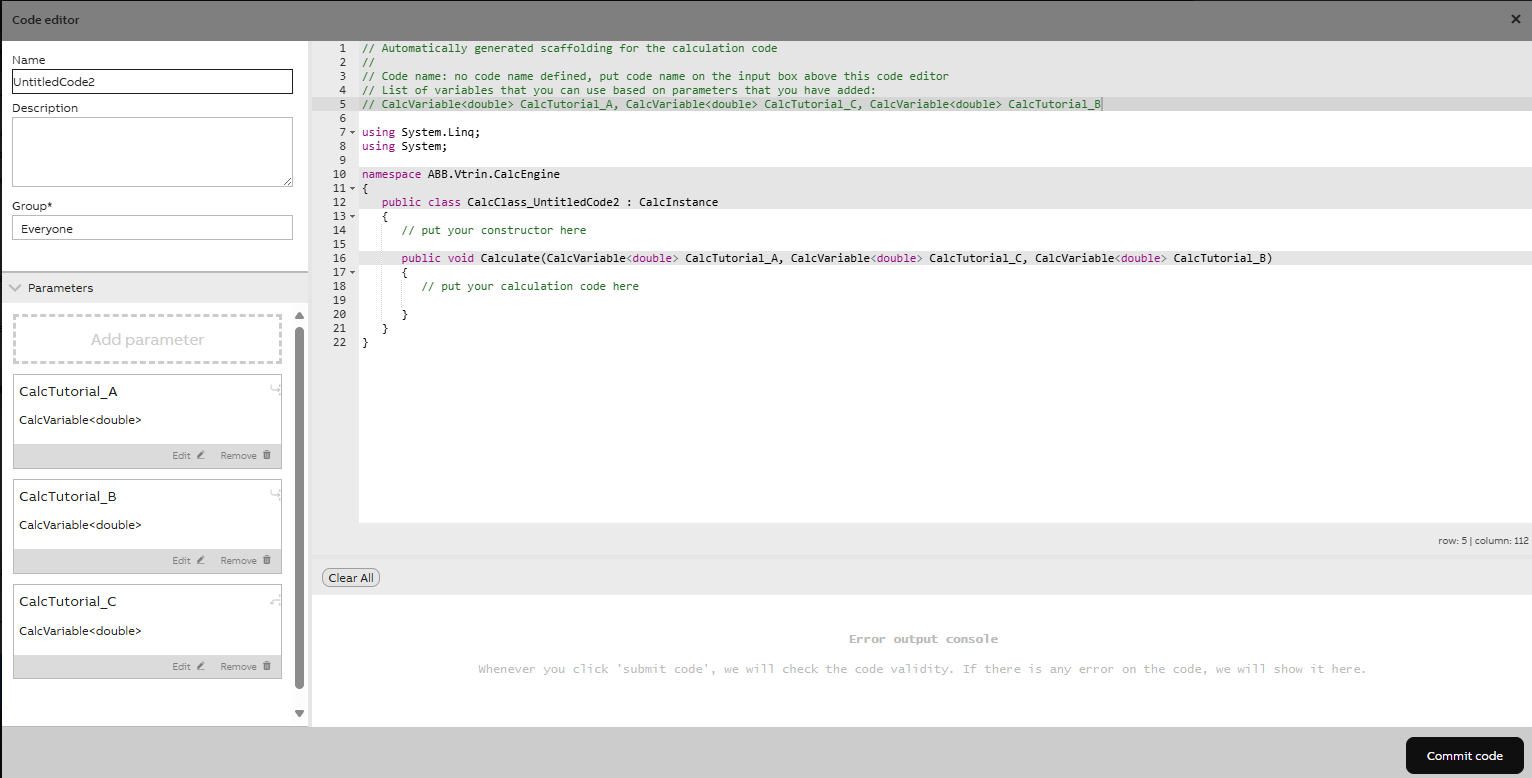
Replace the line
// put your calculation code herewith
CalcTutorial_C.Last = CalcTutorial_A.Last + CalcTutorial_B.Last;Click Commit code to save your code. Finally, close the code editor by clicking the X on the top right.
Adding a scheduler
We have now created the code for your calculation and mapped data to it. The final thing left to do is to tell the calculation when it should run. We'll configure your calculation to run every second.
Click Add new trigger on the left. This opens up the trigger selection dialog. Click Scheduler. This opens up new options for selecting the scheduler.

Click the box that says every 1 Second. Finally, click Commit Changes to close the dialog.
Saving the calculation
We're almost finished. Click Commit Changes to save the calculation. After this, it will start running every second.
Seeing the effects
Make sure that the calculation process is running. Next to each calculation name in Calc Catalog, there is an indicator. Below is an example of the running task in the process:

Switch back to the Variables view. You can now notice how the value of CalcTutorial_C has changed from 0 to 30, which is the sum of CalcTutorial_A (10) and CalcTutorial_B (20).

To see the change happen in real-time, let's change the value of CalcTutorial_A. You can do this by double-clicking the Current value cell for CalcTutorial_A (that is, the text 10). This opens up the current value editing dialog:
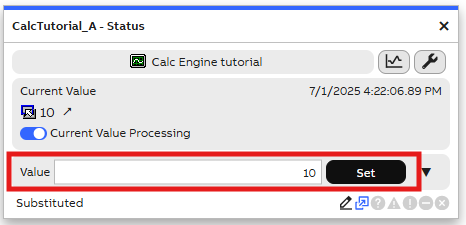
Type "5" in the Manual set field and click Set. This sets the value of CalcTutorial_A to 5. Soon, the value of CalcTutorial_C will change to 25, which is the sum of the new values.
Updated 9 months ago