Netsync Based 3-Level Hierarchical Nodes (Receive Rules)
This document outlines the procedure for enabling tag\variable-based time series data transfer from Level 2 (Plant Level) to Level 3 (Enterprise Level) via NetSync publication within a three-tier hierarchical system. Both the source and target nodes are configured as High Availability (HA) Systems. The source node at Level 2 is a High Availability History server utilizing a Windows-based Network Load Balancer (NLB) setup, while the target node at Level 3 employs the newer Vtrin Load Balancer (VLB) configuration, replacing the Windows NLB.
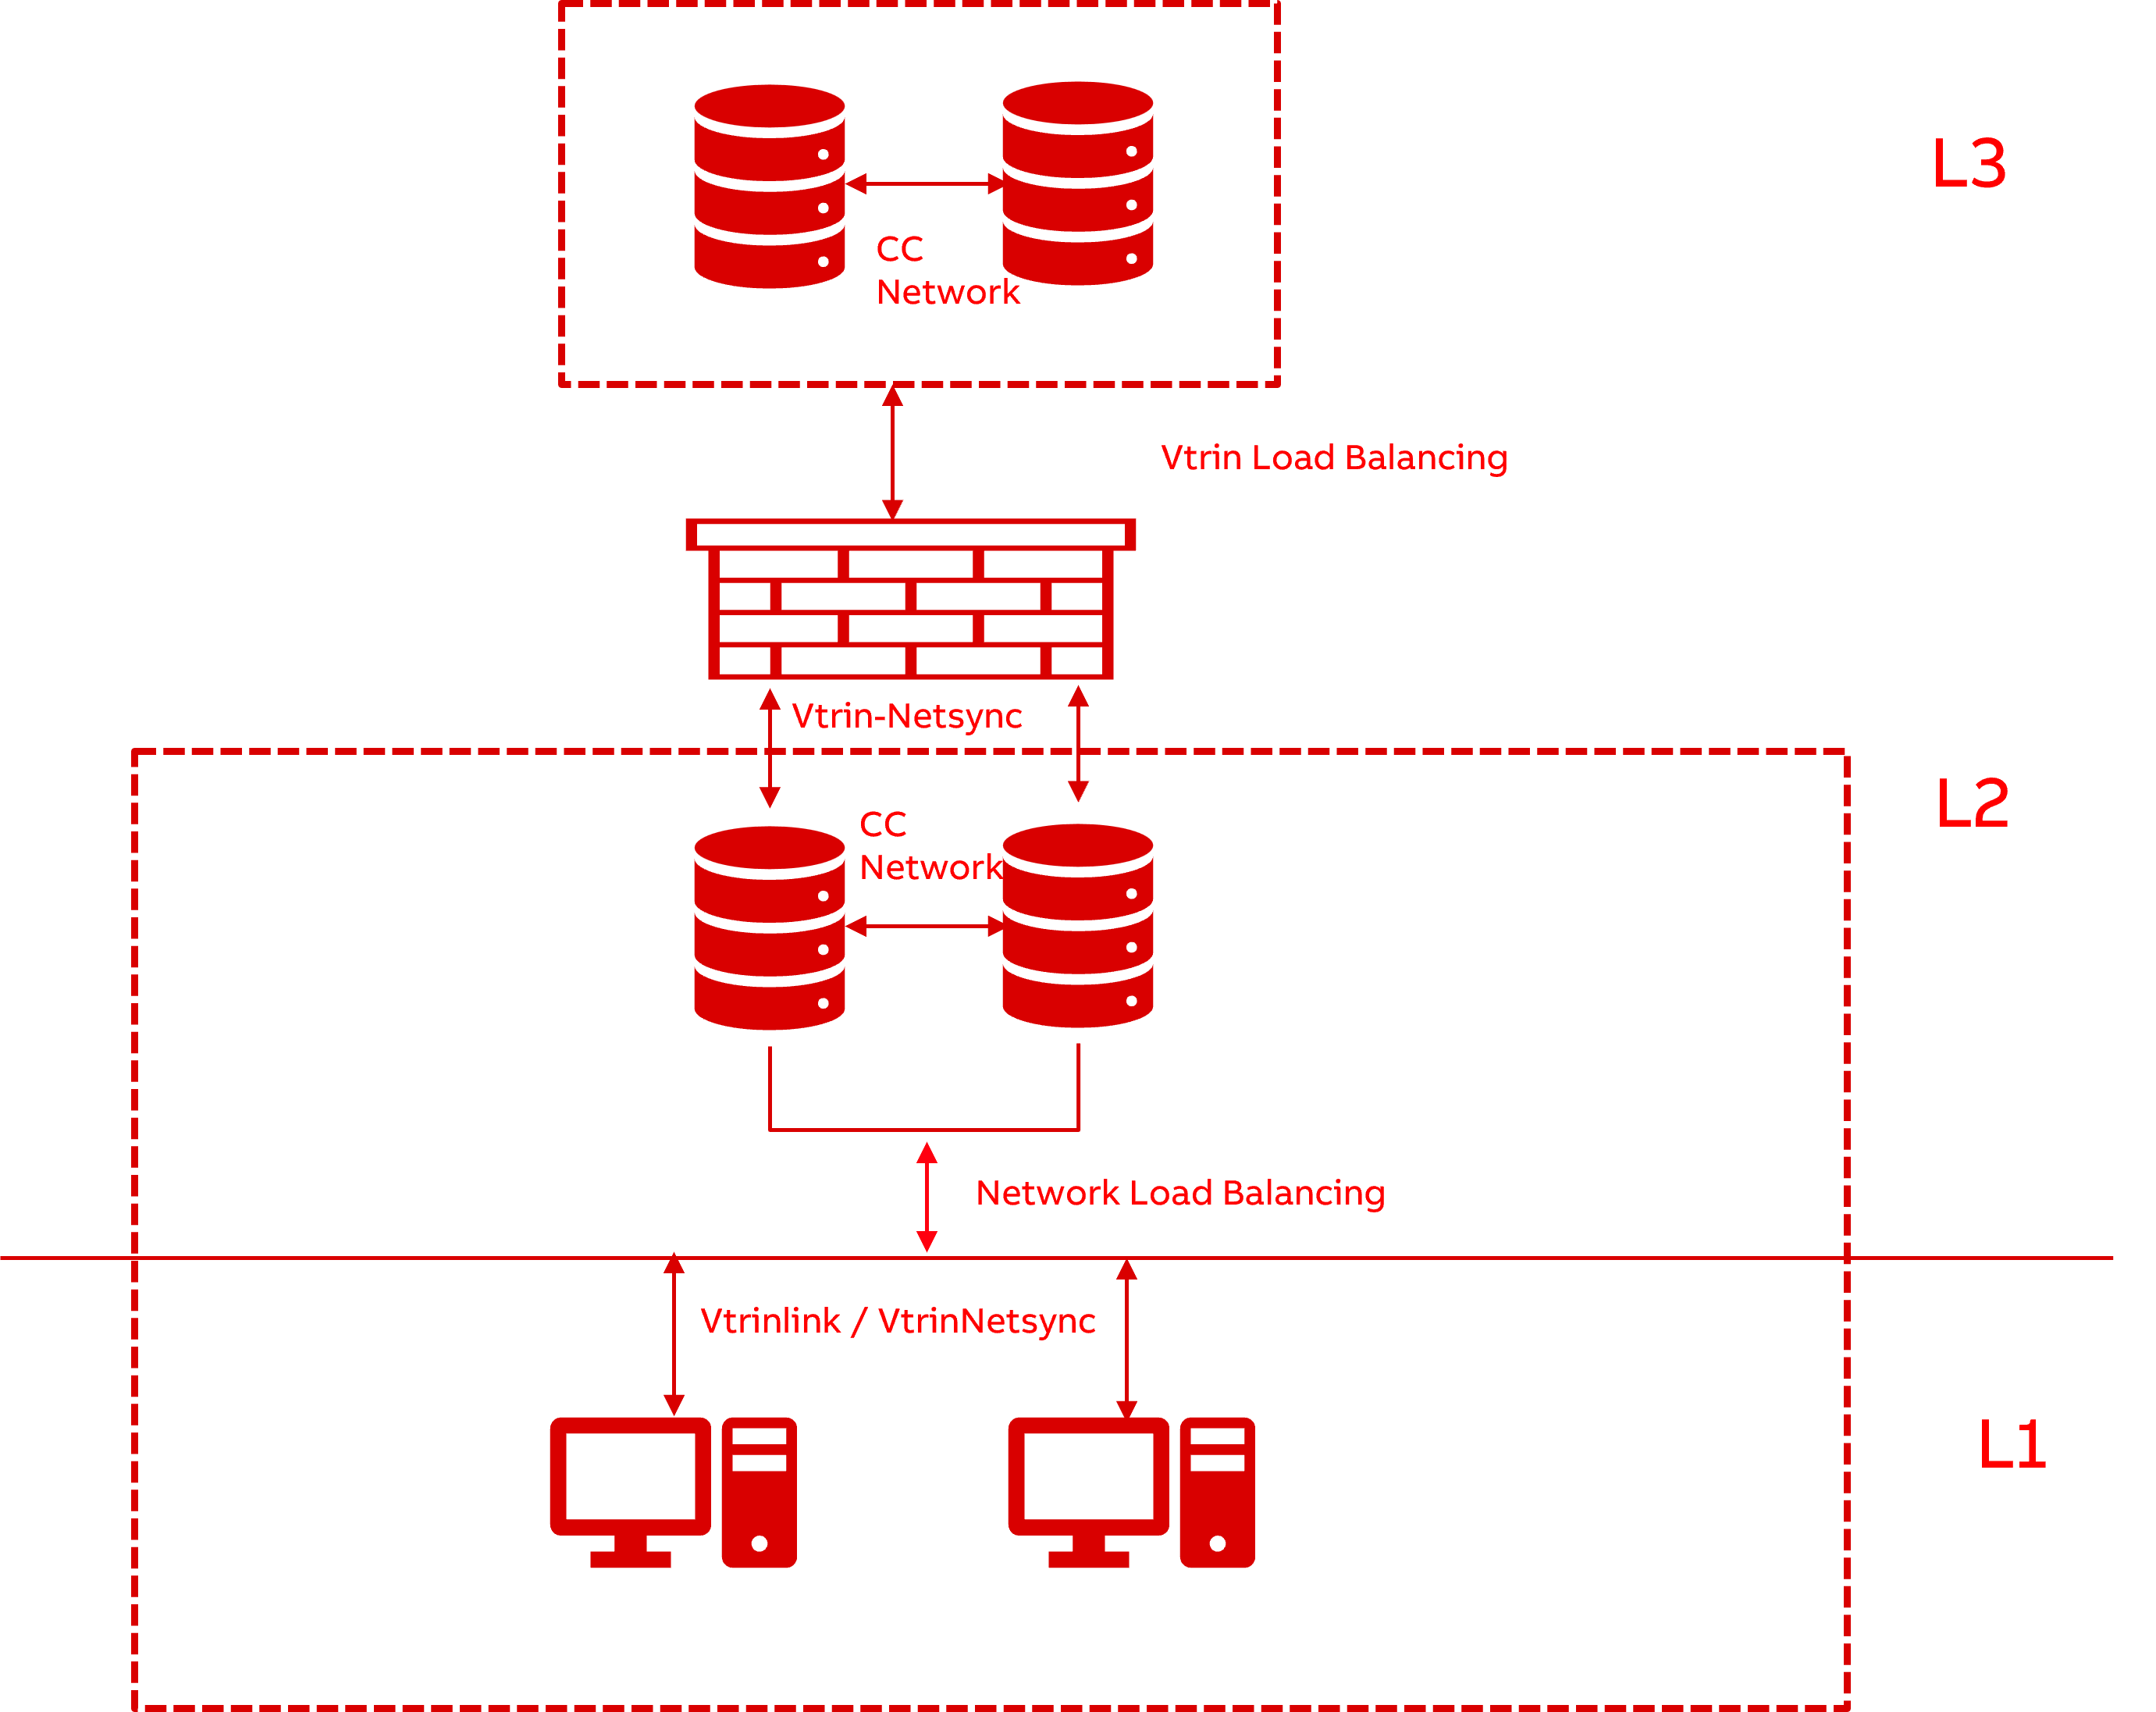
Architecture
This system comprises three levels: L1 features DCNs that transfer Tag/Variable-based data to the L2 HA system. This data is then transferred from the L2 HA to the L3 HA systems via Netsync publication. For L3 history servers, the document will later detail configuring Vtrin Load Balancer (VLB) instead of Windows Network Load Balancer (NLB).
Prerequisite
- Install L2 with High Availability Installation steps
- Install L1 with DCN (Data Collector Node) Installation steps
- Install L3 following the High Availability Installation steps. Since we will use the Vtrin Load Balancer for this L3 Node (covered later in this document), omit the 'Configuring Load Balancer (NLB)' section from the High Availability Installation steps. Continue the installation by assigning a common name of your choice for the switch
/DSN(for example, LBHA-RTDB).
Configuration Sequence
To achieve the receive rules based variable publication, the below sequence needs to be followed.
Note: The below steps needs to be executed in given order only
- Source HA (L2 Node) Node configuration.
- Target HA (L3 Node) Node configuration.
- Receive Rule config in Target servers (L3 Node).
- Variable publication from Source Node (L2) to Target Node (L3) using Receive Rule.
Source HA (L2 Node) Node configuration
- Export the Vtrin certificates from both Target High Availability (HA) Nodes (L3 Node) and import them into both Source nodes (l2 Nodes). Both the certificates from Target HA1 and HA2 nodes should be imported into the Trusted folder of both Source HA1 and Source HA2 nodes. For the export and import process of certificates, please refer to the provided link .
Once the import is completed the Cert store should look similar to below screenshots in each Source Node HA servers (L2 Node)
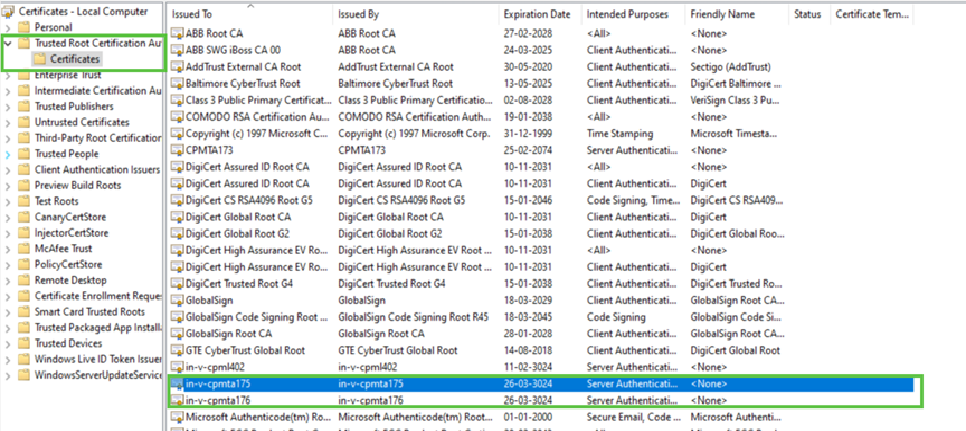
Certificate Store in both source nodes (L2 Nodes)
- Add user credentials of Target with commonVLBName (Vtrin Load Balancer) in Windows Credential Manager of Source HA1 and Source HA2 nodes (VTRIN/commonVLBName). Using below command.
Vtrin-NetServer --username <L3Username> --password <L3Password> --addcredentials <L3CommonVLBName>

## if you have a standalone machine, then use only hostname
## Example command to create an entry in credential vault with name 'Vtrin/LBHA'
Vtrin-NetServer --username bmi_cims --password Mypassw0rd --addcredentials LBHA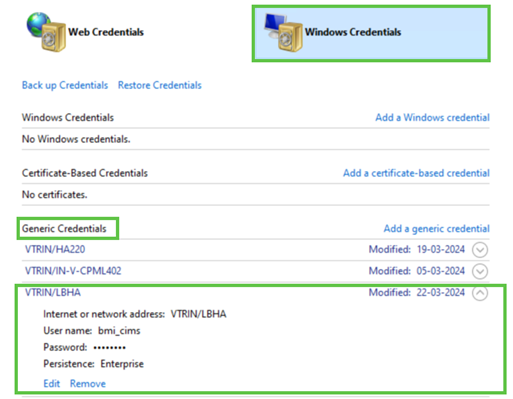
Credential Vault in both Source Nodes (L2 Nodes)
- Add the user as System user in both source HA (L2) nodes by running the below command.
%app_root%\Config\FeatureInstall\APP_TransferVaultEntries.bat /name "VTRIN/CommonVLBName"

## in order to add the credential added in example of previous step the command should be as follows:

%app_root%\Config\FeatureInstall\APP_TransferVaultEntries.bat /name "VTRIN/LBHA”
- Add the host file in both source node (L2 Nodes) with Target HA node (L3 Nodes) entries.
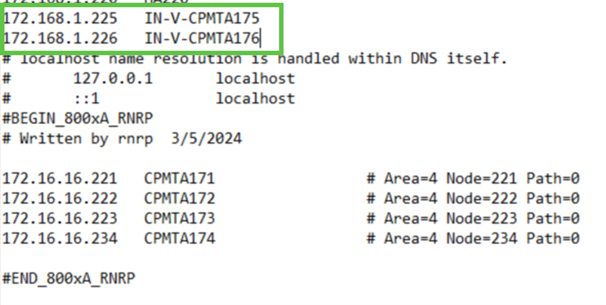
Host File in both source Nodes (L2 Node)
-
Add the Target VLB (Vtrin Load Balancer) node details of L3 in Database Nodes list of any one node of Source HA Servers as follows:
wss://\[<db1>,<db2>]:443/history

DatabaseNode Entry in Source Node
VLB Configuration in Target HA (L3 Node) Node configuration
Insert the following entries into the Vtrin-NetServer.exe.config file located at C:\Program Files\ABB Oy\RTDB\Bin on both HA servers, within the <appSettings> section.
<add key="HostName" value="HA" />  ## this is the common VLB Name and must be same in both HA nodes)
<add key="AlternativeServers" value="wss://IN-V-CPMTA204:443/history" /> ## This is the connection string of the other HA
Note: - Make sure you pass the HA2 entry for ‘AlternativeServers’ in HA1 and vice versa (refer below sample screen shots from both HA of target node).
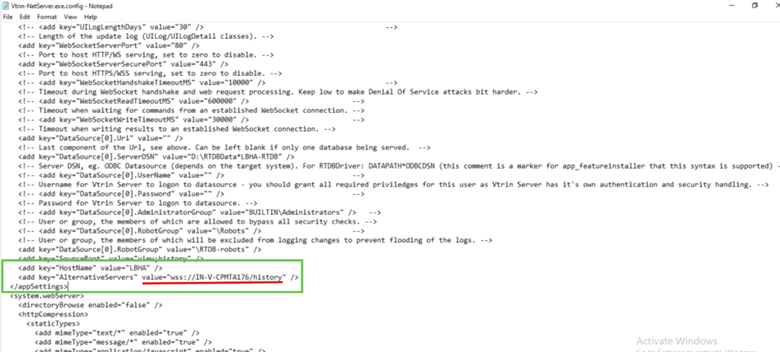
Vtrin-Netserver.exe.config in HA1
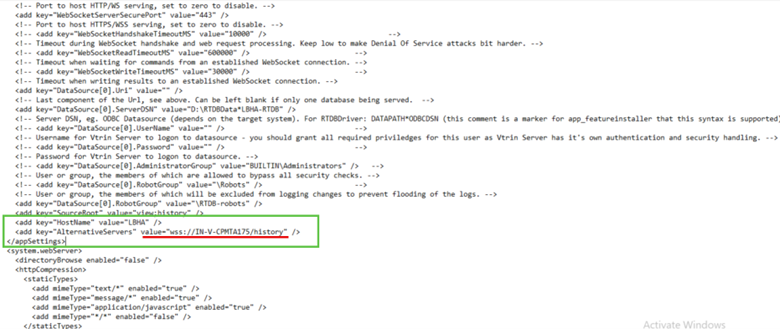
Vtrin-NetServer.exe.config in HA2
Receive Rule config in Target servers (L3 Node).
Netsync is basically designed for Equipment Model based file sync between nodes. In order to get the variables also in target node, we need to add some rules in the list EquipmentReceiveRule so that the variable values published from source is created as variables in target. The below steps can be performed in any one of the Target node, as 'RTDB Consistency Control' service will sync the entries to the other node automatically.
Note: Don't Enable the publication (Keep the enabled check box unchecked) unless you create & commit a valid Receive Rule in target
- Create a new list under User definition with “EquipmentReceiveRule” as the source and save it.
- Now you can make entries to the new list based on the Equipment publication you define in source (L2 Node).
For example,
if you are going to create a publication in your source node,
where,
- Publish Equipment Type – LevelVariables
- Publish Path – {Path} (you can see a smple publication in source Node in the image below)

Sample Equipment Publication is Source Node
in that case, Make the following entry in receive rule,
- Enabled - True
- SourceMask - *
- EquipmentTypeMask – LevelVariables
- EquipmentInstanceMask - *
- EquipmentPropertyMask - *
- OverrideClass – Variable
- OverrideEquipmentType – (None)
- OverrideInstance - {PropertyName}
- OverrideProperty – CurrentValue
- OverrideHistory – (None)

Receive Rule entry for the above example
Important Note: Make sure that a proper receive rule in place before you create any publication in source.
Variable publication from Source Node (L2) to Target Node (L3) using Receive Rule.
- Add the publication for the Variables in any Source HA node.
- In publication you can pass instance filter to publish only specific variable to target
for example,
if you want to publish all the variable which starts with ‘Level’ you can provide following entry in ‘instance filter’ column.
NAME LIKE 'Level*'
Incase if you want to Publish all the variables in the source you can pass * in ‘instance filter’ but that will also publish the default system variables from source machines which are created during installation, to avoid that you can pass below entry in ‘instance filter’ column.
NAME NOT LIKE 'SYS' AND NAME NOT LIKE 'RTDB' AND NAME NOT LIKE 'Transformator'
Note:- Make sure you Enable the publication by checking the check box under ‘Enabled’, only after you create an approporiate receive rule in the target.

Sample variable publication
Updated 4 months ago