Certificate handling
The purpose of this article is to provide instructions on how to create wss/https certificate requests, as well as how to install these signed certificates on servers.
Introduction
The instructions are applicable for the most common use case, where the server is under some domain, and the certificate request needs to be sent to the Domain Certificate Authority for signing. If you work in development environment and want to use a self-signed certificate, please see the separate section later in this document.
It is important to note that the certificate request must be made on the server, on which the signed certificate is installed (Because during the request generation, the private key of the certificate is stored to the key store of the computer. The request file contains only the public key). As a basic principle, signed certificates are only needed on servers, to which Client connections are made. For example, if all Client connections are coming through Gateway servers, the actual RTDB servers themselves do not necessarily require a certificate.
If the system is using Network Load Balancing (NLB), only one common request is made from one of the servers, on behalf of all the servers under NLB. The signed certificate is then installed on the server that the request was made from. After installation, the certificate is exported to the other servers along with the private key, and installed on them as well (see the Exportable definition in Appendix 1).
-
Appendix 1 provides a description of the keys in the inf file (i.e. what each field and value mean). Further details on this can also be found at:
https://technet.microsoft.com/en-us/library/dn296456(v=ws.11).aspx -
Appendix 2 contains instructions on how to test the Vtrin connection with a test certificate. Further details on this can be found at:
https://blogs.technet.microsoft.com/rmilne/2014/06/17/how-to-request-certificate-without-using-iis-or-exchange/
Configuring a certificate request
The default certificate can be found in the folder D:\Application\Setup.
- Make a copy of the vtrincert.inf file and rename it to vtrincertSERVER.inf (replace SERVER with your own server name). This is good practice in order to be able to easily differentiate the certificates for different servers. For example:

- Then open the newly created .inf file (e.g. with Notepad). Clear the contents of the file and replace them by pasting the following lines to it:
[Version]
Signature=”$Windows NT$”

[NewRequest]
Subject = "C=FI, O=ABB Oy, L=Helsinki, S=Uusimaa, CN=server.domain.com"
Exportable = true
KeyLength = 2048
MachineKeySet = true
ProviderName = "Microsoft RSA SChannel Cryptographic Provider"
RequestType = PKCS10
KeySpec = 1
FriendlyName = "vtrincert"
KeyUsage = 0xA0

[EnhancedKeyUsageExtension]
OID = 1.3.6.1.5.5.7.3.1

[Extensions]
2.5.29.17 = "{text}"
_continue_ = "dns=server.domain.com"- Replace the server.domain.com in the CN field in the Subject line with the name of the server that you are making the certificate request on. The name of the server must be a long domain name, and it must be lowercase. Example shown below.
Subject = "C=FI, O=ABB Oy, L=Helsinki, S=Uusimaa, CN=firaaems1.steellan.com"- Do the same on the last line as well. The CN name must be the first DNS name in the Extensions section. Example shown below.
_continue_ = "dns=firaaems1.steellan.com"
NoteMore detailed descriptions of the settings in the example file are presented in Appendix 1.
Creating a certificate request
- Save the .inf file. Open the command prompt (cmd) and navigate to the Setup folder by using the following command:
cd D:\Application\Setup- Then compile the .inf file to a request file with the following command:
certreq -new vtrincertSERVER.inf vtrincertSERVER.req- Again, replace the word SERVER with the name of your own server. An example:
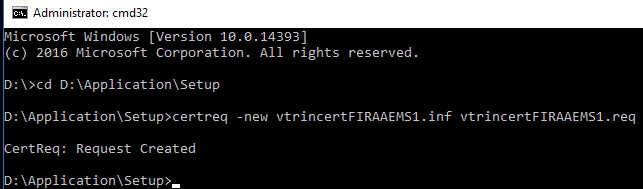
- Now the vtrincertSERVER.req file can be found in the folder:

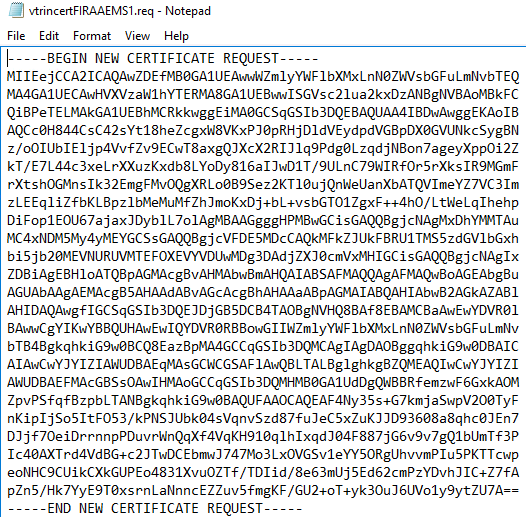
- Open the .req file (e.g. with Notepad). The contents of the file look similar to the following example:
Checking the certificate request for errors
It is a good idea to check the certificate request for errors before sending it. The following three services are examples of suitable tools for this purpose:
https://certlogik.com/decoder/
https://secure.comodo.com/utilities/decodeCSR.html
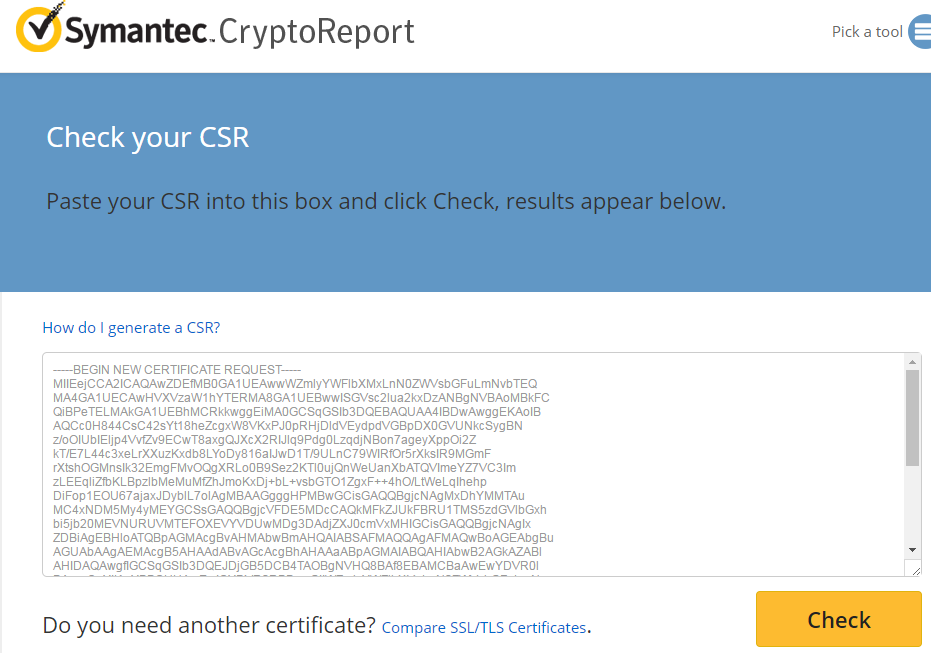
https://cryptoreport.websecurity.symantec.com/checker/views/csrCheck.jsp
In all of these services, the text contained in the .req file is copied in its entirety and pasted to the service window.
- Note: The Certlogik decoder might not show all errors, so it is recommended to check the request in the other services as well.
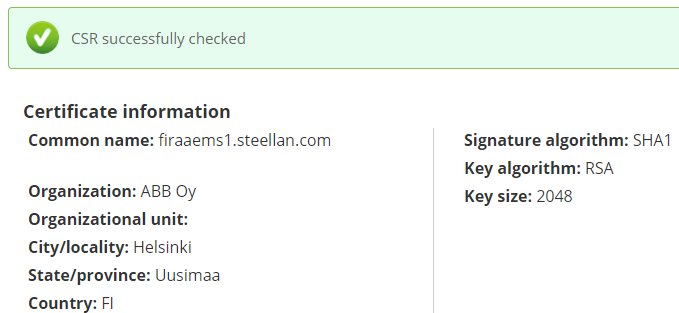
- After pressing the Check button, the following kind of report will be displayed:
Sending the certificate request
The certificate request files (.req files) are emailed to the Certificate Authority (CA) of the server domain. Ask the customer who is responsible for certificate-related issues. Remember to also ask this person to give the certificate a period of validity that is as long as possible. However, this period of validity must not exceed the period of validity for the Root Certificate of the domain.
Viewing certificates
The certificates of the computer can be viewed by following these steps:
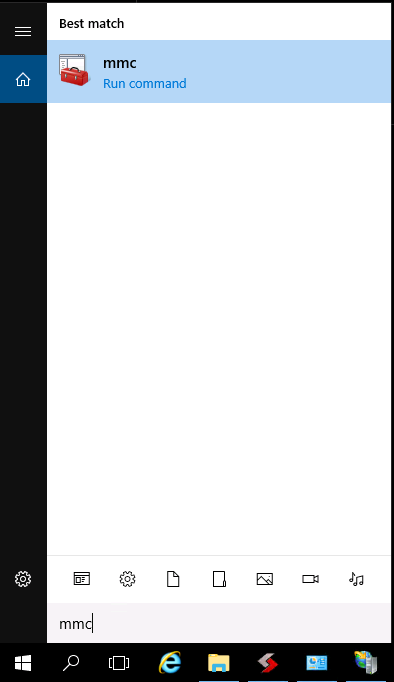
- Type mmc to the Search function of Windows, and press Enter.
- Next, select File → Add/Remove Snap-in... from the console.

- In the following list, click Certificates and Add then select Computer account → Next → Local computer → Finish → OK.

- The Root Certificates can be found in the Trusted Root Certification Authorities → Certificates folder, and their period of validity is shown in the Expiration Date column of the console.
Installing certificates
The CA of the customer sends the signed certificate as a reply. It is installed to the server as follows:
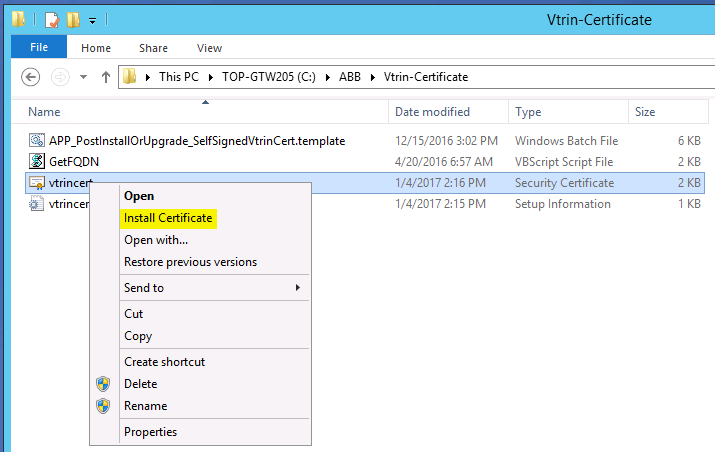
- Bring the certificate to the server. Right-click the file and select Install Certificate.
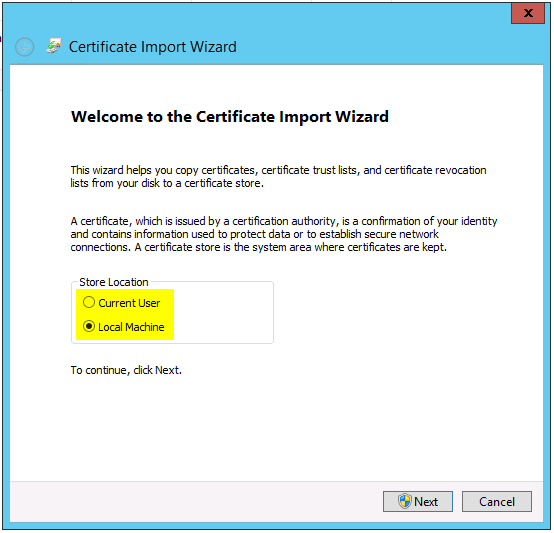
- In the Certificate Import Wizard, select Local Machine and click Next, after which the certificate will be available to all users of the computer.
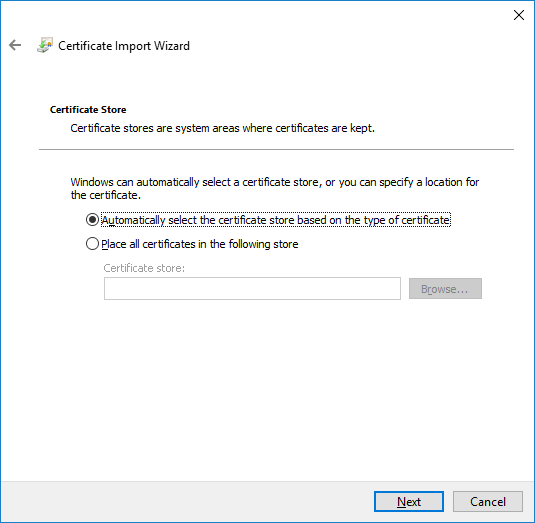
- Select Automatically select the certificate store based on the type of certificate.
- On the last page, check the settings and click Finish. The certificate will now be installed.
- After the certificate installation, the Vtrin Server service needs to be restarted on the server machine (from the Services tab of Task Manager).
Uninstalling certificates
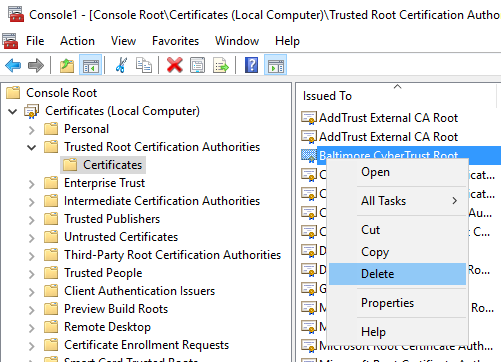
Certificate uninstallation is done through the console.
- Open mmc and select File → Add/Remove Snap-in...
- From the navigation tree, select Certificates (Local Computer) → Trusted Root Certification Authorities → Certificates. Select the desired certificate, right-click it and select Delete from the menu.
- From the navigation tree, select Certificates (Local Computer) → Intermediate Certification Authorities → Certificates. Select the desired certificate, right-click it and select Delete from the menu.
- From the navigation tree, select Certificates (Local Computer) → Personal → Certificates. Select the desired certificate, right-click it and select Delete from the menu.
An example:
Retrieving new public key non-interactively
Sometimes it may be required to be able to retrieve or update a public key to cache non-interactively. The Vtrin.exe can be used for this purpose by supplying the -connectonly parameter along with the -acceptnewserverkeys or -acceptserverkeychanges switches. The exit code zero indicates success. In case of errors, more diagnostics are provided to debug trace.
Example:
vtrin.exe -dsn tcp://myhost/mydb -user myuser -pass mypass -debugtrace mylog.log -connectonly -acceptnewserverkeys -acceptserverkeychangesProgrammatically, the keys can be accepted or rejected automatically by supplying flags to cDataLoader.Connect. For more information on this, please refer to VtrinSDK.
Appendix 1: Descriptions of the settings in the inf file
In this section, a description of each of the settings in the example file is provided, in order to clarify what they mean and what their function is.
Further information on this subject can also be found at: https://technet.microsoft.com/en-us/library/dn296456(v=ws.11).aspx
Signature line
[Version]
Signature=”$Windows NT$”
[Version]: The brackets surrounding the text are used to indicate the beginning of a new bloc/section.
The Signature line tells that the certificate is coming to a system with Windows Server 2008 or newer operating system.
Subject line
[NewRequest]
Subject = "C=FI, O=ABB Oy, L=Helsinki, S=Uusimaa, CN=server.domain.com"
[NewRequest] indicates that the actual certificate request starts here.
The Subject line gives background information on who is requesting the certificate:
- C=FI: This is the two-letter country code of the company that is requesting the certificate.
- O=ABB Oy: This is the entire official name of the company that is requesting the certificate.
- L=Helsinki: This is the locale/city of the company that is requesting the certificate.
- S=Uusimaa: This is the state/province of the company that is requesting the certificate.
- CN=server.domain.com: This part is extremely important. Insert here the full long name of the server.
Exportable definition
Exportable = trueThe Exportable definition is used to define whether the private key of the certificate can also be exported when the certificate itself is exported. The value can be either true or false. Exporting the certificate might be necessary, for example, when the certificate needs to be stored on a USB drive, or installed on another computer. Certificates can be exported in mmc by selecting File → Add/Remove Snap-in..., right-clicking the certificate, and selecting All Tasks → Export...
Key Length
KeyLength = 2048KeyLength defines the length of the public and private key. The key length affects how secure the key is. A longer length usually means a better level of security. The vtrincert default length is 2048.
MachineKeySet
MachineKeySet = trueMachineKeySet defines the security context of the certificate. The value can be either true or false. If the value is true, the certificate is created in the security context of the computer. If the value is false, it is created in the admin context instead. When the admin creates the certificate on behalf of the computer, this value needs to be true, as otherwise the computer will not be able to access the private key.
ProviderName
ProviderName = "Microsoft RSA SChannel Cryptographic Provider"ProviderName is the name of the Credential Service Provider (CSP). The available CSPs on the computer can be seen by entering the command certutil -csplist in the command prompt.
RequestType
RequestType = PKCS10RequestType defines the standard that is used to generate and send the certificate request. Other standards are PKCS7, CMC and Cert.
KeySpec
KeySpec = 1KeySpec defines whether the key can be used for signing, enciphered exchange, or both. The value 1 means that it is used for encipherment.
FriendlyName
FriendlyName = "vtrincert"FriendlyName is an important field, as it defines what name the certificate is known by. This value must be the same as in the Vtrin Server configuration (C:\Program Files\ABB Oy\RTDB\bin\Vtrin-NetServer.exe.config):
KeyUsage
KeyUsage = 0xA0KeyUsage defines what purposes the key should be used for. The value 0xA0 means "Digital Signature, Key Encipherment". Symbolic representations can also be used instead of the hexadecimal value. A list of these representations can be found at:
https://technet.microsoft.com/en-us/library/dn296456(v=ws.11).aspx#Certreq (under Certreq -new)
[EnhancedKeyUsageExtension]
OID = 1.3.6.1.5.5.7.3.1
Additional definitions for KeyUsage
This section contains additional definitions for key usage:
- OID = 1.3.6.1.5.5.7.3.1 means that the key can be used for server authentication.
[Extensions]
2.5.29.17 = "{text}"
_continue_ = "dns=server.domain.com"
[Extensions] means additional general definitions:
- 2.5.29.17 = "{text}" means that the next lines contain Subject Alternative Name (SAN) addresses in text form. Below this are listed the full names or IP addresses of all the computers that need to able to communicate with the serve (i.e. the computers that need to be able to access Vtrin). The names of the computers must be written in lowercase. Computers that are in the same domain as the server do not need to be listed here.
NoteThe CN name must be listed as the first SAN name, as in the example above.
If more than one computers need to be listed (there is always at least one that needs to be listed), an & character is added to the end of each computer's name, except for the computer on the last line.
An example:
[Extensions]
2.5.29.17 = "{text}"
_continue_ = "dns=server.domain.com&"
_continue_ = "dns=bestserver.megadomain.com&"
_continue_ = "ipaddress=132.235.45.18&"
_continue_ = "url=http://example.domain.com"
Appendix 2: Testing the connection with a self-signed certificate
You can install a temporary test certificate in order to test the Vtrin connection.
- Navigate to the folder D:\Application\Setup
- From this folder, delete the vtrincert.cer file that is automatically generated during installation.
- Then open the command prompt, and navigate to this folder with the following command:
cd D:\Application\Setup\ - Then enter the following command: certreq -new vtrincert.inf vtrincert.cer
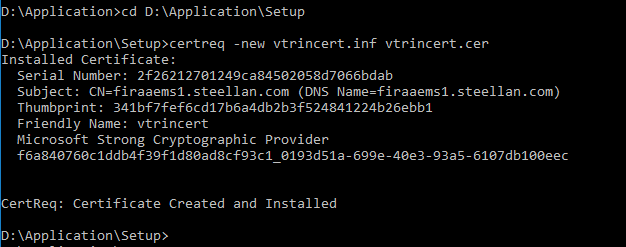
Compiling the file may take a few minutes. A new, locally compiled vtrincert.cer file will appear in the folder:

The certificate is automatically installed to the computer's Personal folder. Next, it is copied to the Trusted Root Certification Authorities folder:
- Open mmc and select File → Add/Remove Snap-in...
- Copy (Ctrl+C) the newly created certificate from the Personal → Certificates folder to the Trusted Root Certification Authorities folder.
- Make sure that both certificates display the name that you wrote in the Vtrin NetServer Configuration in the Friendly Name column (vtrincert by default).

- When you get the complete certificates from the customer, delete these default certificates (see the uninstallation instructions in section Uninstalling certificates).
CA signed certificate
This section describe the process of using openssl command-line tool to create a CA-signed PKI infrastructure that is capable to be deployed by Vtrin. We can install openssl command line tool easily in Linux and Windows, even though it is recommended to use the tool in Linux and bring the generated results to Windows.
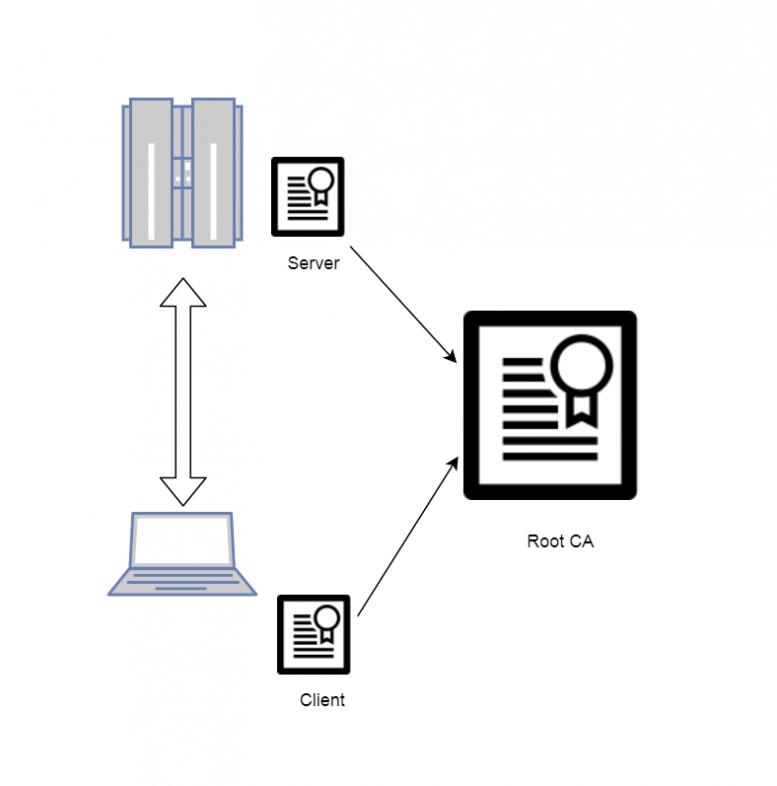
Setting up the CA, Server and Client Certificate
1. Create a CA certificate
CA Certificate is used to issue trusted relationship in the infrastructure, to guarantee that the certified identify is authorized and legit. Public part of the CA can be installed to machines in the infrastructure while the Private part must be properly protected.
- To create a new CA certificate, open a command prompt and enter:
openssl req -newkey rsa:4096 -keyform PEM -keyout ca.key -x509 -days 3650 -outform PEM -out ca.cer- The command will ask for various kind of details, which example answer can be found as below. PEM pass phrase will be needed whenever CA is used to signed a new certificate.
Generating a 4096 bit RSA private key
..........................................++.............................................................................................................................................................++
writing new private key to 'ca.key'
Enter PEM pass phrase: '''<Password to protect the CA>'''
Verifying - Enter PEM pass phrase: '''<Password to protected the CA>'''
-----
You are about to be asked to enter information that will be incorporated
into your certificate request.
What you are about to enter is what is called a Distinguished Name or a DN.
There are quite a few fields but you can leave some blank
For some fields there will be a default value,
If you enter '.', the field will be left blank.
-----
Country Name (2 letter code) [AU]:'''FI'''
State or Province Name (full name) [Some-State]:'''Uusima'''
Locality Name (eg, city) []:'''Helsinki'''
Organization Name (eg, company) [Internet Widgits Pty Ltd]:'''ABB Oy'''
Organizational Unit Name (eg, section) []:
Common Name (e.g. server FQDN or YOUR name) []:'''ABB Root CA'''
Email Address []:'''[email protected]'''
2. Creating signed Server certificate
This certificate will be used by Vtrin-NetServer. So it is advisable to use the FQDN to identify the server in the certificate.
- Let start by opening a command prompt and start creating a server key:
openssl genrsa -out server.key 4096- Then create a certificate signing request:
openssl req -new -key server.key -out server.req -sha256- Then sign the signing request with the ca certificate we have generated above:
openssl x509 -req -in server.req -CA ca.cer -CAkey ca.key -set_serial 100 -extensions server -days 1460 -outform PEM -out server.cer -sha256- And finally package the public and private part of the server certificate so that it can be installed in Windows and used by our Vtrin-NetServer:
openssl pkcs12 -export -inkey server.key -in server.cer -out server.pfx- After this, we should have a CA-signed server certificate server.pfx that we can already deploy to our Vtrin-NetServer.
- We can also delete the server.req file as we are no-longer need it.
3. Creating the signed client certificate
Let us begin by creating a config file to limit the use of our generated client certificate named openssl.conf. The content of the file is:
[client_server_ssl]
extendedKeyUsage = clientAuth- Then create a private key and a signing request just as we did with our server part, ensuring that the client will have a proper name to be identified later.
openssl genrsa -out client.key 4096
openssl req -new -key client.key -out client.csr- After we sign the client certificate with our CA certificate and the configuration file above:
openssl x509 -req -extensions client_server_ssl -extfile openssl.conf -in client.csr -CA ca.cer -CAkey ca.key -CAcreateserial -out client.crt -days 3650- At this step, we should have a signed certificate client.crt. In order for it to be used for browser authentication and OpenSSL client authentication, we can package the certificate with the private key in a P12 format or PEM format:
openssl pkcs12 -export -inkey client.key -in client.crt -out client.pfx
openssl pkcs12 -in client.pfx -out client.pem- Lastly, we can delete the client.csr file as we no longer need it.
Installing Certificates to Server and Client
1. Installing the signed server certificate
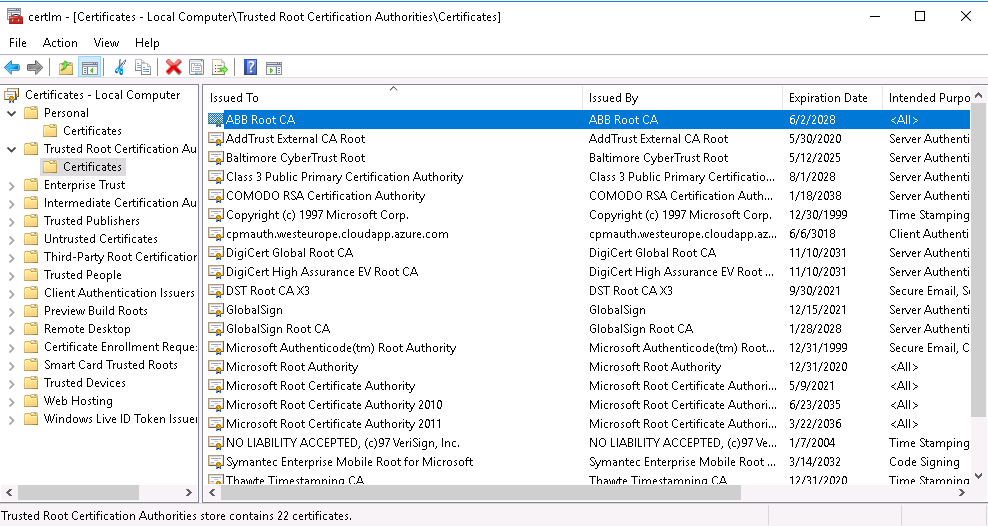
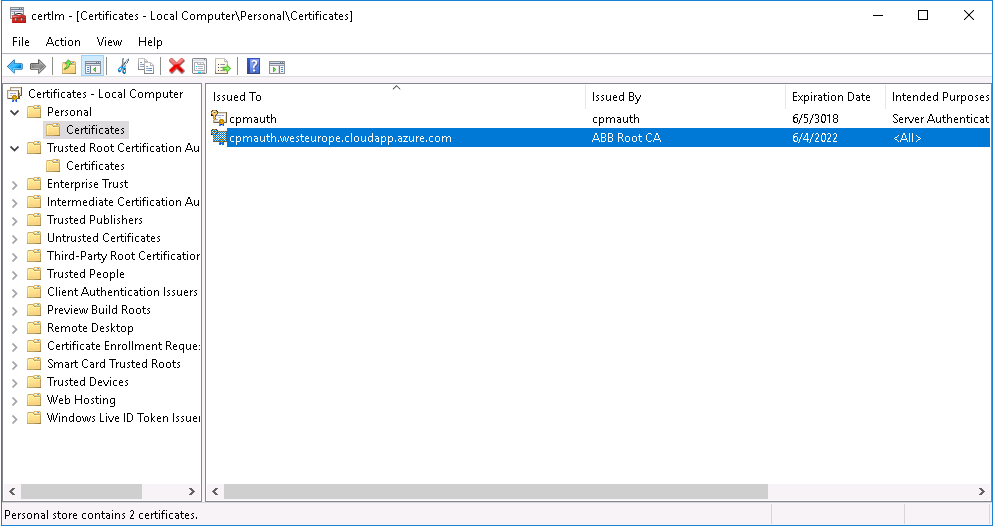
- Copy the ca.cer and server.pfx to the server.
- Install ca.cer to Local Computer\Trusted Root Certification Authorities and the server.pfx to Local Computer\Personal. The result should look as follows.
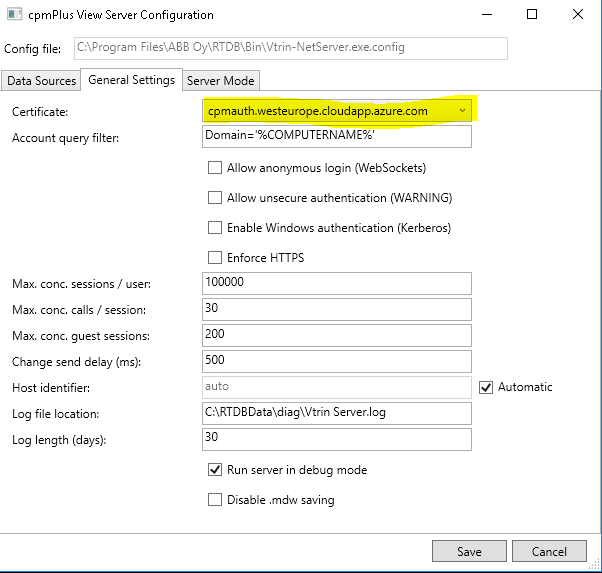
2. Upgrade Vtrin-NetServer to accept the new certificate
- Lauch the GUI tool and update the General Settings -> Certificate to use the new installed Server Certificate.
- Upgrade the Vtrin-NetServer.conf with the following settings:
<add key="EnableCertificateAuthentication" value="true" />
<add key="EnableKerberosAuthentication" value="false" />- Then add to <system.webServer> section:
<security>
<authentication>
<anonymousAuthentication enabled="false" />
<basicAuthentication enabled="false" />
<certificateAuthentication enabled="true" />
<windowsAuthentication enabled="false" />
</authentication>
</security>- Finally, open a Vtrin connection to the Vtrin-NetServer and upgrade the Access Control List table as follow, make sure to use the correct client name in place on TestClient003.
- After this step, restart Vtrin-NetServer and you you be able to use the client certificate to authenticate, log into Vtrin web application (cpmPlus View) as well as produce data with C++ eSDK or C# EqM.

3. Install the Client certificate to browser and verify
In this section, we will install the CA certificate and Client certificate to browser. This ensures that our PKI is in order and that we can use the client certs for data production and etc.
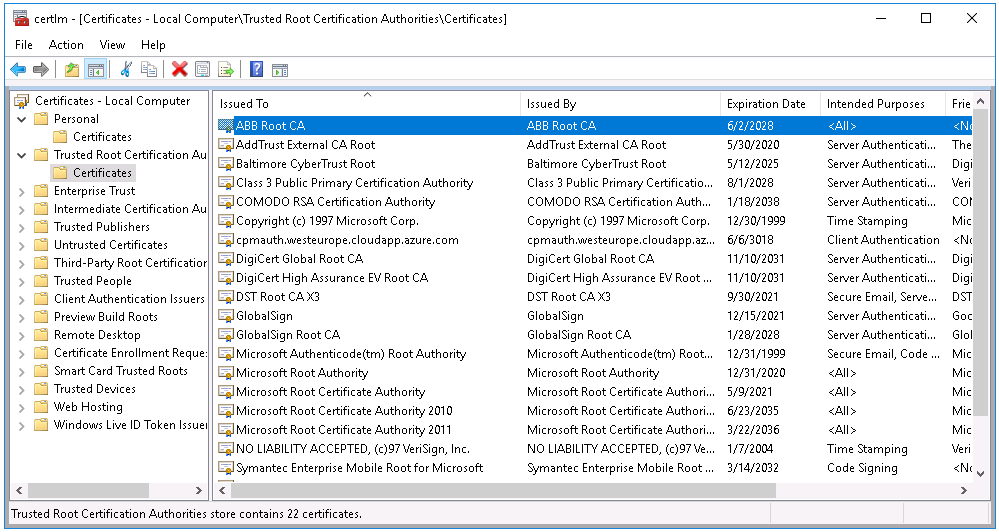
- Let the ca certificate install to Local Computer\Trusted Root Certification Authorities the same as Server part.
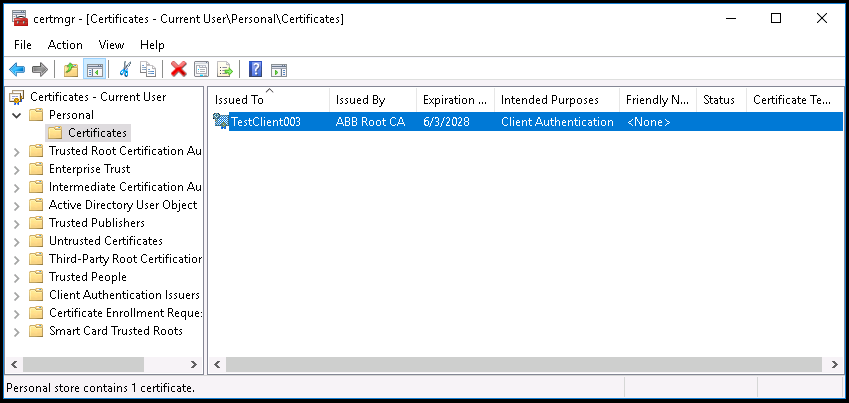
- Then install the Client certificate to Current User\Personal, make sure that the Intended Purposes of the certificate actually contains only 'Client Authentication'.
4. Using openssl client to verify
From the Linux machine that we used to generate the certificate, we can use openssl to connect and test the generated certificate
openssl s_client -connect <host>:<port> -cert client.pem -key client.key -state -debugSelf signed certificates
If you need to create a self-signed certificate for development purposes to use secure web sockets, you can do so by following these steps:
With a script under History development environment
If you have the History development environment installed, you can use a script to install the certificate as follows:
- Start a Devel command prompt and execute the following command:
echo "%RTDBROOT%\..\FilesForDistributionImage\Base For RTDB Project\Application\Setup\APP_PostInstallOrUpgrade_SelfSignedVtrinCert.template.bat" > "%TEMP%\vtrincert.bat"- Then start a Software command prompt as administrator and execute the following command:
"%TEMP%\vtrincert.bat"Note that if you want to run Vtrin-NetServer as a non-admin user on windows, you should make sure that it can read the private key. This can be done as follows:
- Run mmc.exe
- File -> Add/Remove Snap-In -> Certificates (Computer account)
- Locate the certificate with Friendly Name "vtrincert", right click -> All Tasks -> Manage Private Keys
- Make sure the user you intend to run NetServer as is listed under Security > "Group or user names"
- Press Add...
- Under the box "Enter the object names to select " write your user name (NMEA\USERNAME)
- Press ok - Add "Full control" permissions to the intended user.
Manually
Open a text editor, create a new file called vtrincert.inf, and paste the following contents to it. Also modify the myhost.mydomain.com to what your host name and domain suffix is.
[NewRequest]
Subject = "CN=myhost.mydomain.com"
Exportable = true
KeyLength = 2048
HashAlgorithm = SHA256
MachineKeySet = true
RequestType = Cert
KeySpec = AT_KEYEXCHANGE
FriendlyName = "vtrincert"
; Remove the following two lines if you are running on Windows 2008 Server (without R2)
ValidityPeriod = "Years"
ValidityPeriodUnits = 1000
KeyUsage = "CERT_KEY_ENCIPHERMENT_KEY_USAGE | CERT_DATA_ENCIPHERMENT_KEY_USAGE"
[EnhancedKeyUsageExtension]
OID = 1.3.6.1.5.5.7.3.1
If the system has multiple names, or if you want to also connect to the system by using IP address(es), they can be defined as Subject Alternative Names, by appending the following kind of section to the inf file: Note: Actually nowadays browsers require the hostname to be in the subject alternate name field instead of common name.
[Extensions]
2.5.29.17 = "{text}"
_continue_ = "dns=myhost.mydomain.com&"
_continue_ = "dns=mynlb.mydomain.com&"
_continue_ = "ipaddress=10.1.1.100&"
_continue_ = "ipaddress=10.1.1.101"
NoteThe original name that was used in the CN keyword in the subject MUST ALSO BE specified in the SAN by using the dns keyword as shown in the above example. Otherwise, the name will no longer be accepted in the connection uri.
NoteThe above example also includes IP addresses. However, I was unable to make them work. There was always a "site name mismatch" error when I tried to use the IP address in the connection string. I used IP addresses that were private. I am not sure if public IP addresses would work.
Use the certreq -new command to generate the certificate and store it to the certificate store of Local Computer, and also save the certificate without a private key to a cer file.
- Open an administrator command prompt and run the following command:
certreq -new vtrincert.inf vtrincert.cerInstalling the certificate to client side
If you want to avoid the "The provided security certificate is not trusted" error when you use the self-signed certificate, you can install the certificate from the created vtrincert.cer file to the "Trusted Root Certification Authorities" store on the client computer (use right-click and install certificate, and select the correct store manually).
A safer alternative may be to let Vtrin trust the certificate (when it presents it during the connection dialog), which means that the certificate will be trusted only for Vtrin use.
Exporting certificate (Windows)
You can export the certificate and private key from windows certificate store. There is an option: right click - all tasks - export. This allows to define the format and choose whether to export the private key as well. If you are exporting to use as server certificate in Vtrin-NetServer, you need the private key. For azure application gateway, pfx(p12) format is needed.
In windows the key is only stored in the "Personal" store of the certificate store. The trusted store only contains the public certificates. You need to export from the Personal store to get the key.
Deleting the certificate
If you want to remove an incorrectly installed certificate from the server, do as follows:
- Start an empty management console with: start, run, mmc
- In the mmc, select File, Add/Remove Snap-In, Certificates, Computer account
- Navigate to Certificates (Local Computer) / Personal / Certificates
- Locate the certificate and delete it
Upgrade expired certificate (Windows)
- Delete the old certificate (see previous guide).
- Create a new certificate.
Updated 9 months ago