Dashboard Commit Actions tutorial
Dashboard Commit Actions allow you to create or update class instances or update current values for variables. This is done with button widget. Next we will go over the different configuration options for that. We will configure all these settings with dashboard scripting settings. Utilizing scripting in View empowers Ability History users to engage with View APIs through JavaScript.
Getting started
When you open the properties of a dashboard, you will find a property called Scripts. You can access the script popup by clicking on the ellipses.
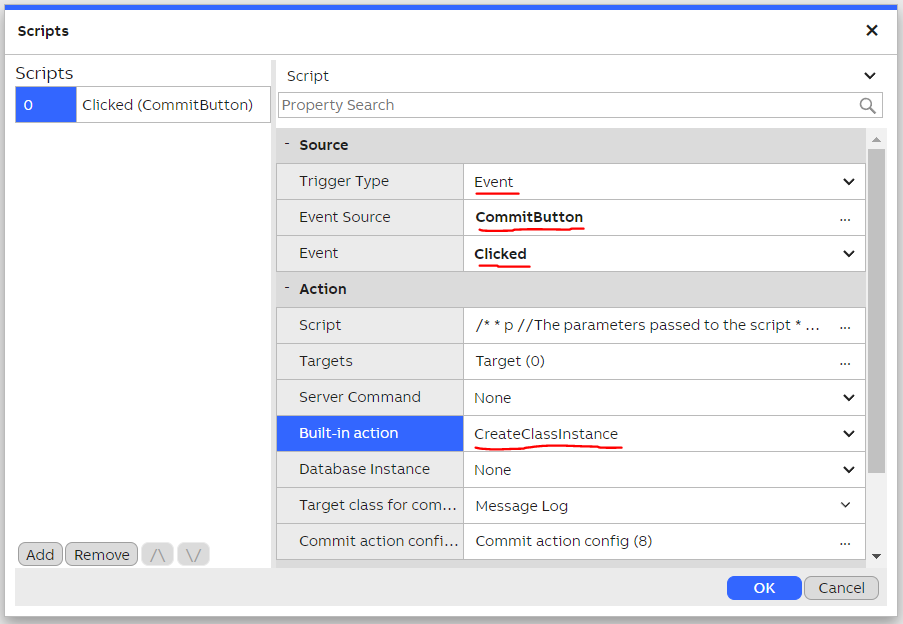
Add new script on the left side menu and to determine how the commit action should be be triggered, configure the following for the Source:
- Trigger Type: For configuring a button click event, you would select “Event” for the Trigger Type.
- Event Source: : Select a Button widget from the dashboard (in the example there is a button named 'CommitButton') as the source.
- Event : Select “Clicked” as the Event.
After this, under the Action section we choose one of the Built-in action. It currently has three options:
- Update class instance
- Create class instance
- Set current value
When you have selected one of these, new options for selecting target class and target instance appear.
Commit action configuration for a dashboard
Selecting target class and target instance
After you select any of the three built-in actions mentioned above, you must next select what data you want to create or update.
First option is to use a Class Instance widget to select the target class, and in case of updating existing data, also the target instance. If you open the Database Instance dropdown, you can select any Class Instance widget that's added to the dashboard. That widget should be configured so that it has at least the "Source" property selected and also "Selected Id", if you want to edit an existing class instance.
Another option is to select target class and instance from the dropdowns under the Built-in action selection. Target instance can be only selected after selecting the target class, and in case you have selected to update existing data.
After setting up the target class and instance configuration, a selection with title “Commit action configuration”, or “Set current value configuration”, appears, depending which action type you chose.
Updating and creating class instances
Selecting “Commit action configuration” opens a window, where you can configure values for each property of the class instance you want to create or update.
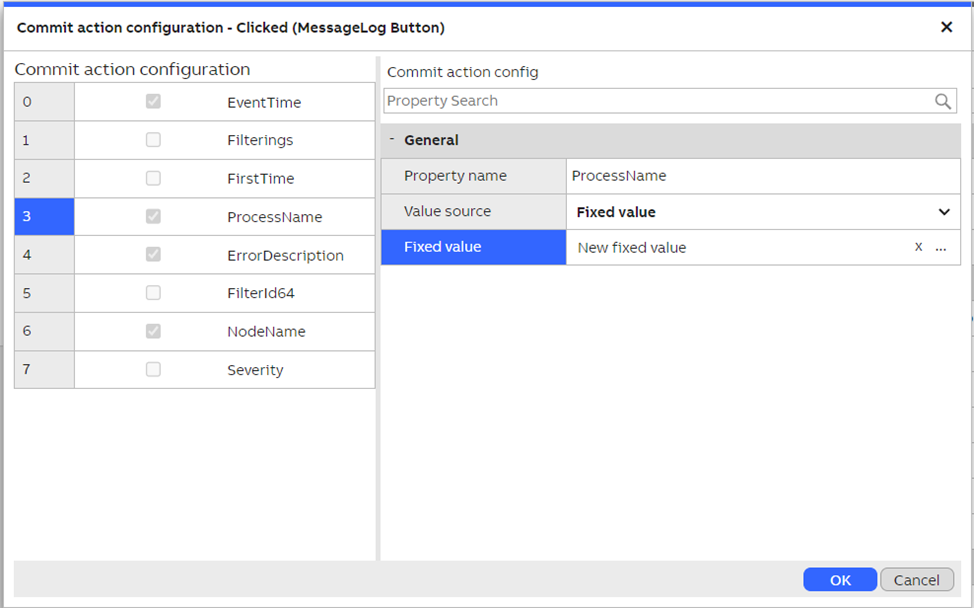
Configuring values for a created or updated class instance. In this example "Message Log" class is used. A fixed value is selected for property "ProcessName".
After you select a class property from the left side list, a selection called “Value source” appears on the right side, under the selected property’s name. With that selection you can configure a source for that particular property’s value. The options are as follows:
- Keep original. The value is not changed. For an existing instance, the original value is preserved, and for a newly created instance, the default value is used. The default value depends on the value type of the property.
- Fixed value. Here you can determine a fixed value to be used for the property value. A property editor appears below where you can type or select the value, depending on the property’s value type.
- Property reference. Here you can select a property reference from a widget on the dashboard, or the dashboard itself. The value is then read from that particular widget’s property when the action is triggered.
- Event argument. Here the property value comes from the event argument, which is passed to the action. For example, the Button widget has a property called “Value”. The value of that property is passed to the action as the event argument, when the button is clicked, and you have configured to use the button’s click event as your event trigger. If you have created a custom script, then the event argument is determined by the return value of that script. If you are configuring a date property, then there is another option of using the event time. In that case, the time of the event firing is used as the value for that property.
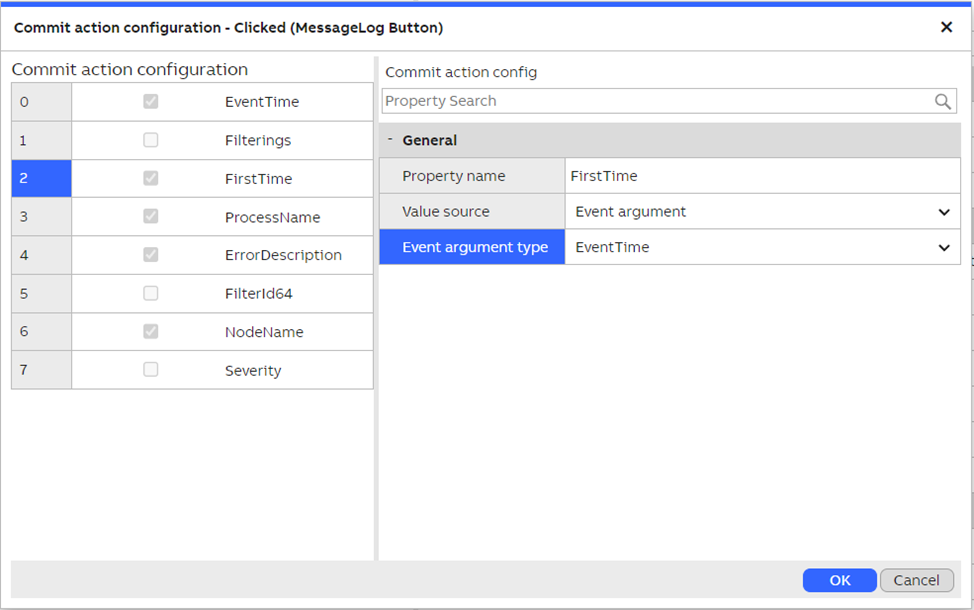
Event time is used for the property "FirstTime"
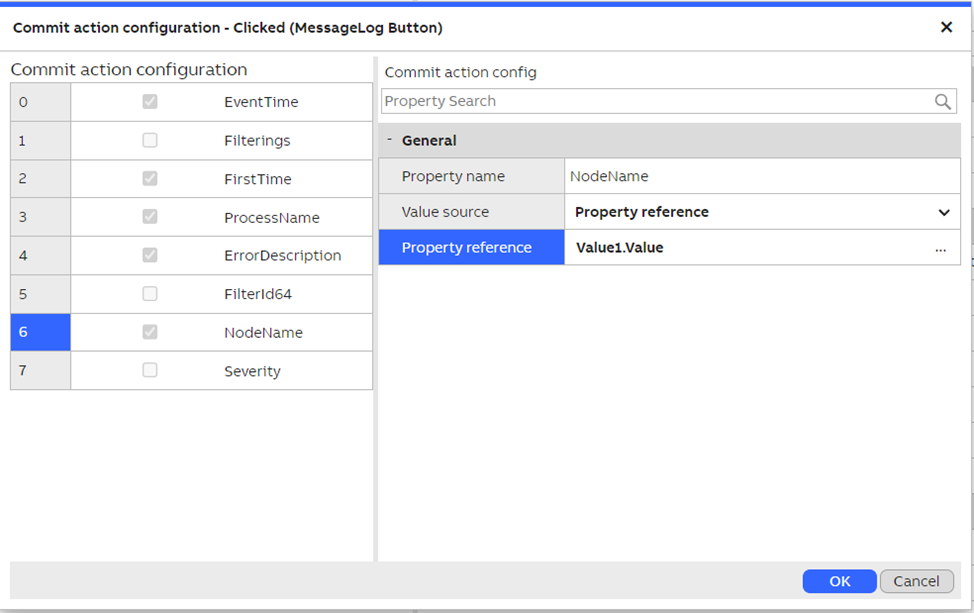
Property reference is used for property "NodeName"
Setting current value
When configuring current value updating, you don’t have to select which properties to update. Only select the value source for the new current value. That works exactly the same way you would configure each class property, when updating a class instance. So, you just select the value source like described in the previous section, and that’s it.
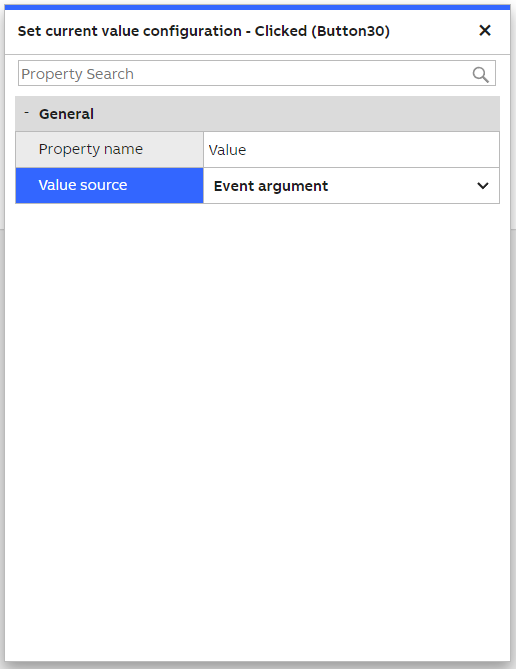
Configuring current value updating. In this case the Event argument value is used a the new current value.
Example: Setting current property value to variable
Next we will give an easy example on how to write non-historized equipment property value to variable. Both are floating point, 64 bits values.
Create dashboard, add widgets and configure
First we will create a new dashboard and add the following widgets: Class Instance, Select and button.
For Select widget we add our equipment model to Source and for Property the property which value we choose to send to variable. On the Select widget property settings we also deselect the "Allow None".
For Class Instance Source we add our equipment model as above.
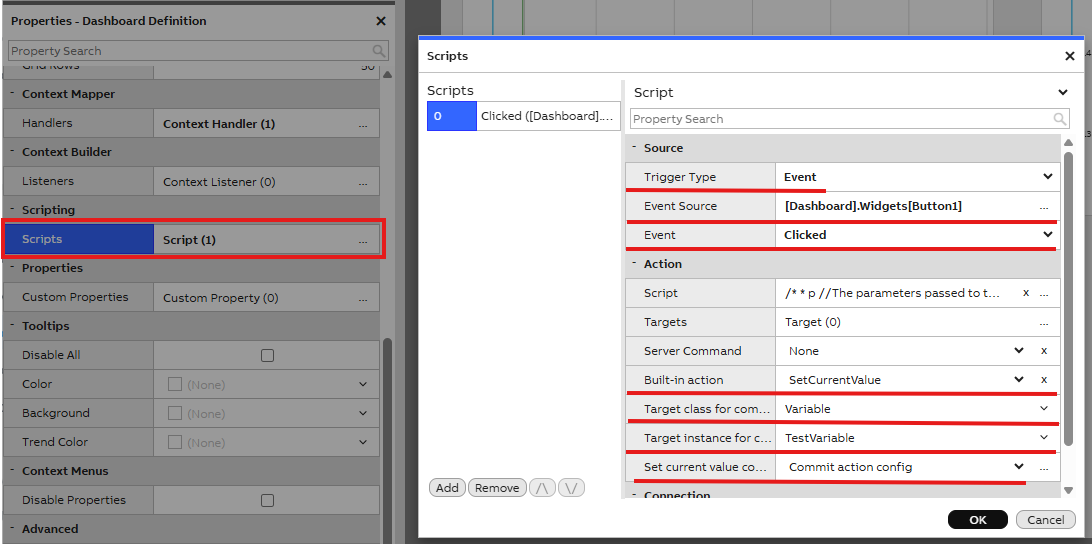
Then for the button configuration, we need to use our dashboard script settings. We open our dashboard script settings and configure the following:
- Trigger Type: Event
- Event Source: ButtonName (In settings choose Dashboard > Widgets > Button)
- Event: Clicked
- Built-in action: SetCurrentValue
- Target class for commit action: Variable
- Target instance for commit action: VariableName (choose the variable from the dropdown menu to which you want to send the property value)
- Set current value configuration: Commit action config
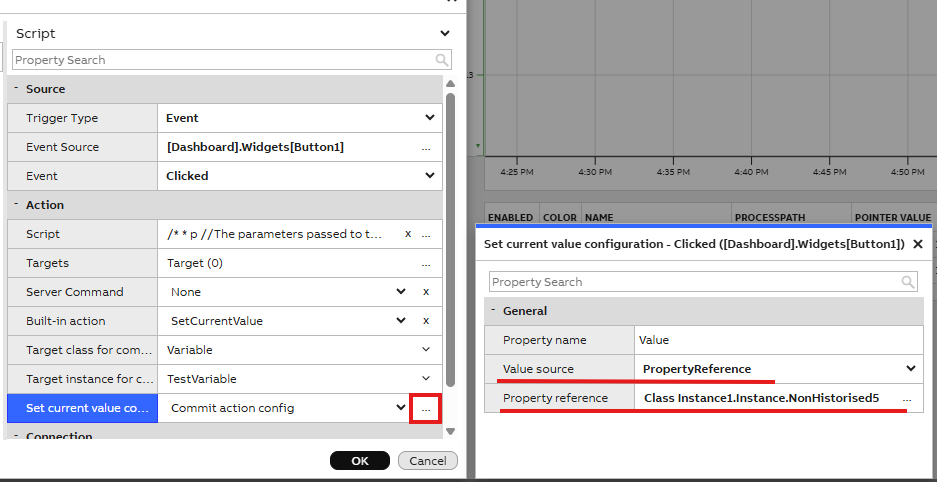
- In commit action config settings we further need to configure the following:
- Property name: Value
- Value source: PropertyReference
- Property reference: PropertyName (Select the equipment property from where the value is coming from. Class Instance > Instance > PropertyName)
Remember to save settings before closing the script menu.
Test
After saving and closing edit mode, we can check that the logic works as intended. Choose any property from the Select widget dropdown menu (if there are multiple instance values) and press button. Now go to Variables display and check, if the variable value has changed to same as chosen property value. If value changes your done, if not, please check each step carefully to make sure you added all needed configurations.
Updated 6 months ago