Part 2 - Single equipment instance
In this second part of the tutorial, we will create a calculation that operates on the properties of a single equipment instance. This tutorial uses the Example equipment model, which is set up in Part 0.
The problem
The example equipment model defines a Tank equipment type, which includes the following properties:
| Property | Data type | Unit | Historized | Description |
|---|---|---|---|---|
ContentsVolume | double | m3 | Yes | The volume of water in the tank. |
Level | double | mm | Yes | How high the water surface is from the bottom of the tank. |
Diameter | double | mm | No | The diameter of the tank. The tank is a cylinder. |
We're going to calculate the volume of the tank's contents by using the surface level and the diameter of the tank.
The formula
Since the tank is cylindrical, we can use the formula for cylinder's volume:
V = PI * (d / 2)^2 * hwhere V is the volume of the cylinder, d its diameter, and h its height. You may notice that the unit for ContentsVolume is m3, which differs from that of Level and Diameter, which is mm. Therefore, we also need to divide by 1000000 to get the units right. Substituting all this into the formula above, we get the following final form:
ContentsVolume = PI * (Diameter / 2)^2 * Level / 1000000000The equipment instance
We're going to add the calculation to the Source tank.
- On the left side navigation, under Information Model, select the Equipment Instances view.
- From the Equipment Class list that opens on the left side, select
Tank. - On the Instances view on the right, type
Source tankinto the input above the Name column.
Now you'll only see the Source tank instance listed:

By scrolling the rightmost view all the way to the right, you can see the values of the tank's properties:

You can see that currently the value of ContentsVolume is uninitialized. After we're done, we'll come back to this view to change Level and observe how it's reflected in ContentsVolume.
Creating the calculation
To create a new calculation, open up the Calculation Tool view from the left side navigation under Applications > Calculations > Catalog:
Click Add Calculation button to open up the calculation creation dialog:

On the top left, fill in the following information:
- Name: "ExampleVolume"
- Group:
\RTDB-CalcUser
Defining data mappings
Next, we'll select the equipment instance (Source tank) we'll be making the calculation for.
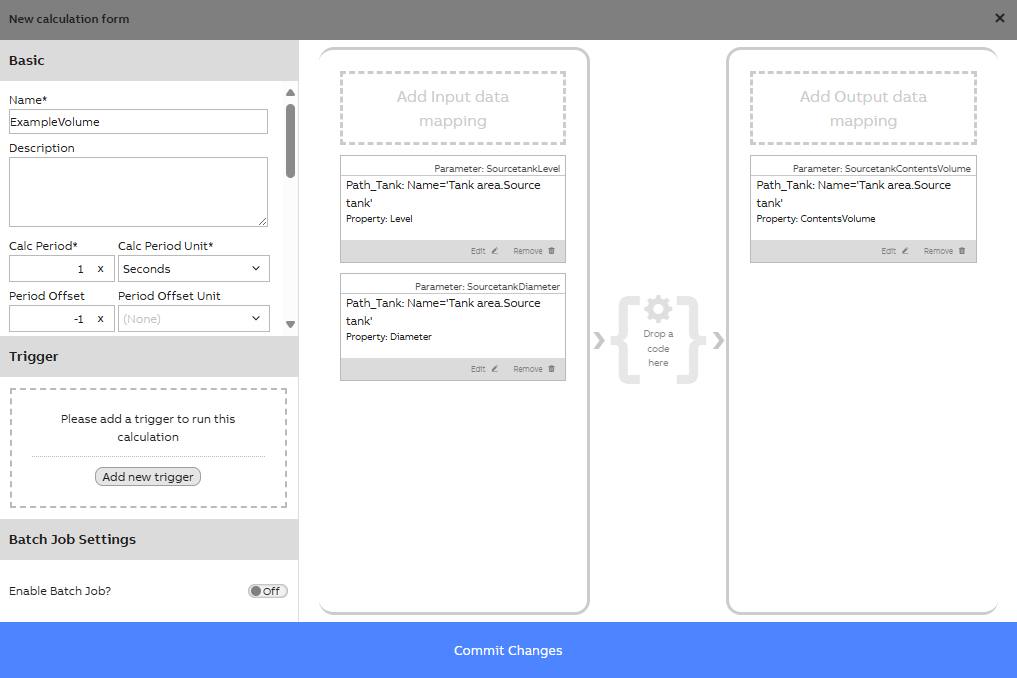
From the equipment hierarchy tree on the right, locate Source tank either by search bar or navigate to Example site, then Tank area, and finally Source tank to select the instance. From the equipment property view, drag Level and Diameter into the input parameter view on the top right. Drag ContentsVolume from the property view into the output parameter view on the bottom right. The required field are highlighted bellow:
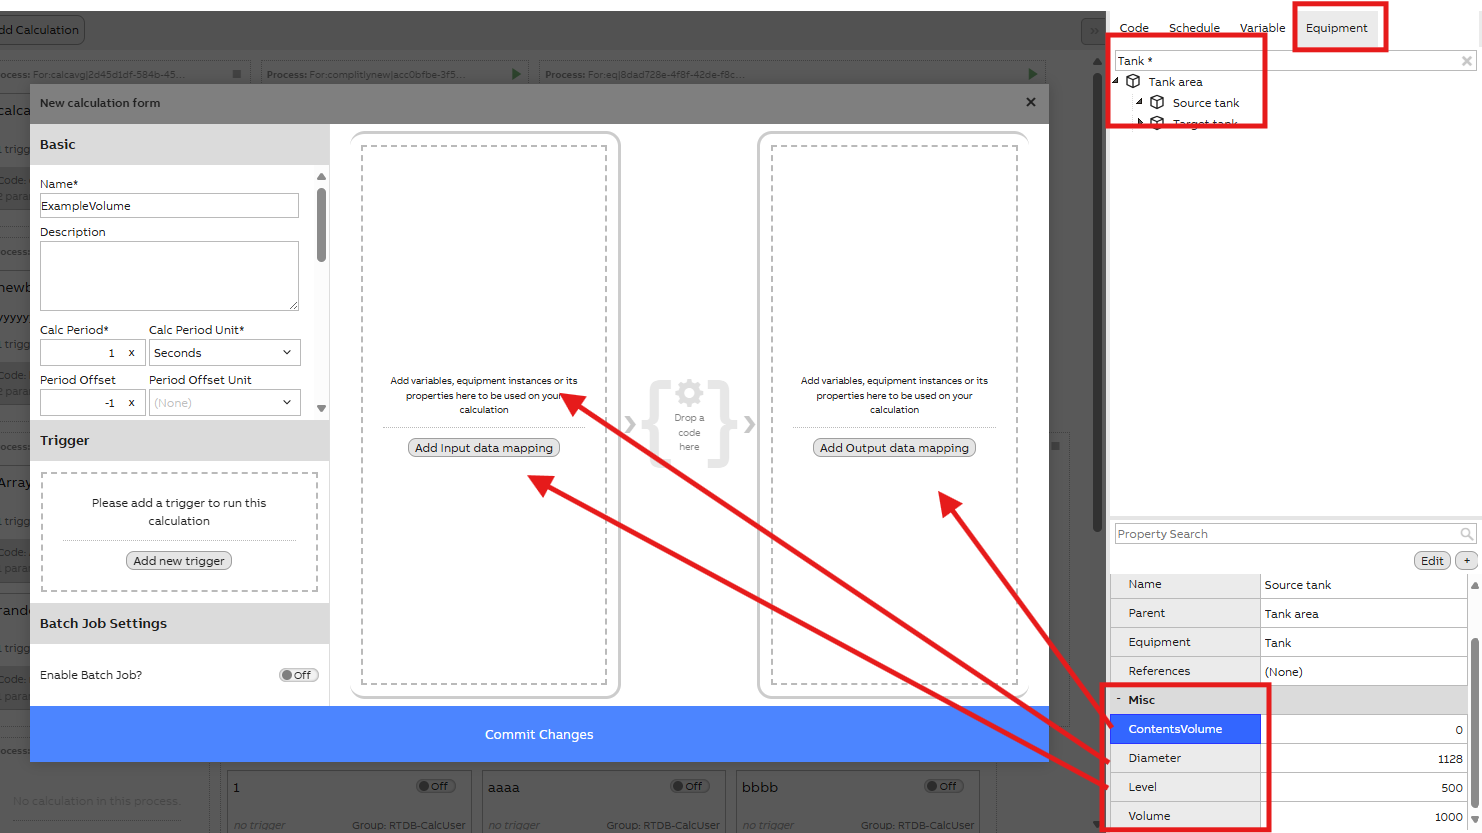
The final mapping should look like:
Tip: Please find further information and guidance on data mapping settings under code & data mapping settings.
Note that if at any moment the mapped equipment or it's property is deleted or renamed, we need to check the calculation afterwards and remap.
Create the calculation code
Next, we're going to add the code to the calculation. Click CalcDefinition element in the middle. This will open up the code selection dialog (if you haven't completed Part 1, it will skip this step and go directly to the code editor).
Click Add new code. This will open up the code editor:

First, you must define the group that owns this code. From the Group field, select Everyone.
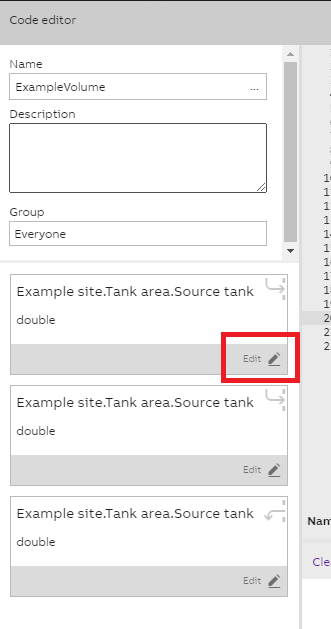
Define the parameters
Next, on the left side parameter listing, click the Edit button for the first parameter:

This opens up the parameter editing dialog:
In the Name field, type Level.
For the Type field, select CalcVariable<double>.
Click Save to close the dialog.
Repeat this for the second parameter. Set Name to Diameter and leave Type as double.
Repeat also for the third parameter. Set Name to ContentsVolume and Type to CalcVariable<double>
Note about equipment with special characters in their nameCalcEditor will automatically escape special characters in the equipment name and/or equipment properties name with replacement string with this pattern _, except for space character, which will be escaped with double underscore (__), so if your equipment name is "My equipment@plant1", the type name for that equipment will be escaped to be like this "CalcEquipment_My__equipment_at_plant1". Note that if the special replacement strings are used in original names, conflicts can happen. So for example, if you are using two equipment in your code with these 2 names: My equipment and My__equipment, this will result in conflict. You need to change the name of one of your equipment.
Equipment property names have two additional escaping mechanisms:
- If a property name starts with number, the first number will be turned into string with the name of the number in English appended by underscore. So, if the property name is 12prop, it will be turned into one_2prop.
- If a property name is the same as one of C# global keywords, it will automatically be prefixed with @ character. So if the property name is "class", it will then be prefixed with @ to be "@class"
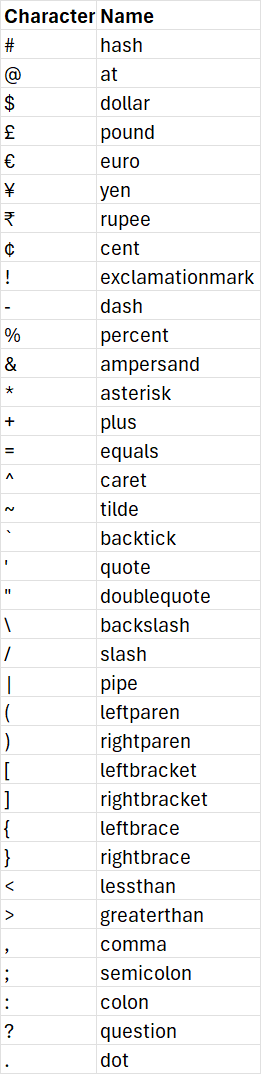
Not all special characters will automatically be replaced with its simple name, non common characters will instead be replaced with its hex code. So, for example, if your equipment name is "myEquipment™" it will be replaced with "myEquipment_x2122_". Below is the list of all the special characters that will be replaced with its English name:
Add the code
Replace the line
// put your calculation code herewith
ContentsVolume.Last = Math.PI * Math.Pow(Diameter / 2, 2) * Level.Last / 1000000;Your code editor should now look like this:

Click Commit code to save your code. Finally, close the code editor by clicking the X on the top right.
The following dialog might appear:

If you've completed Part 1, the code selection dialog will appear. Select ExampleVolume from the code selection dialog and click Done picking code.
Adding a scheduler
We have now created the code for your calculation and mapped data to it. The final thing left to do is to tell the calculation when it should run. We'll configure your calculation to run every second.
Click Add new trigger on the left. This opens up the trigger selection dialog. Click Scheduler. This opens up new options for selecting the scheduler.

Click the box that says every 1 Second. Finally, click Commit Changes to close the dialog.
Saving the calculation
We're almost finished. Click Commit Changes to save the calculation. After this, it will start running every second.
Seeing the effects
Make sure that the calculation process is running. Next to each calculation name in Calc Catalog, there is an indicator. Below is an example of the running task in the process:

Switch back to the Equipment instance view. You can now notice how the value of ContentsVolume has changed from 0 to 500.
To see the change happen in real-time, let's change the value of Level. You can do this by double-clicking the Level cell for Source tank (that is, the text 500 mm). This opens up the current value editing dialog:

Type 400 in the Manual set field and click Set. This sets the value of Level to 400. Soon, the value of ContentsVolume will change to 400, which is the result of your calculation code.

Updated 8 months ago