Open dashboard from Instance in View
This tutorial will give you details on how to enable opening a dashboard from Instances in View. This is especially helpful when you want to create one dashboard and utilize it to show different instances of your Equipment model. This is done with "Send To" functionality where the target is the created dashboard.
Picture below shows that we have three instances in our Equipment Model and we are able to open our "EquipmentModel dashboard" by right clicking any of these. The dashboard shows data of the chosen instance.
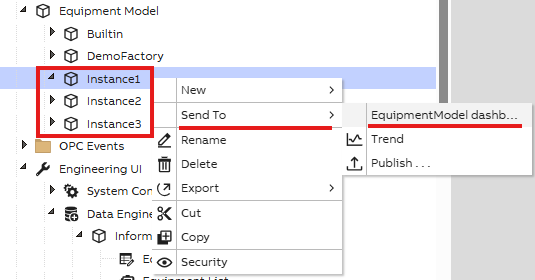
"Send To" functionality may be used for different instances of one equipment model.
Step 1: Create a dashboard
Before completing this tutorial we have created a dashboard with relevant widgets and data within. This way we have only few steps to complete the "Send To" functionality for our instances.
Step 2: Add Context Handler
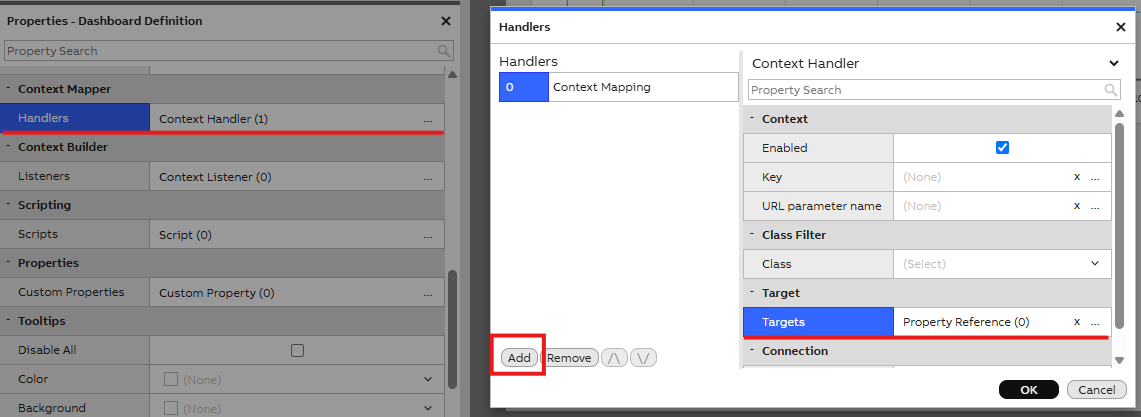
To send the added data of each instance to every widget in the dashboard, we will use Context Handler to set our widgets as targets. This enables that all the widgets and given data within opens correctly when selecting "Send To" from any Instance of our Equipment Model.
Context handlers can be added and modified in Dashboard property settings as shown in picture below.
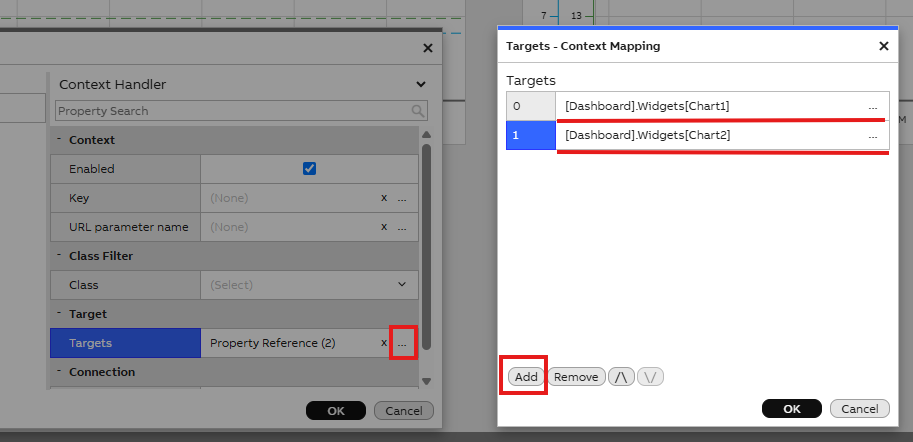
As targets of our context handler we add all our dashboard widgets. In our example we have two charts so we add these. Please see picture below for example.
Step 3: Add dashboard to UI References
As the last step we need to add our dashboard in UI References to allow the "Send To" feature from each instance of our Equipment model. This is done similarly as configuring UI References to custom edit dialog.
In Engineering UI we open our UI References display and there we add new and configure settings as shown in the example below.
- Text: Give a name to reference that you recognise. This will be shown in the "Send To" menu.
- Sort Key: Gives the order for dashboards if more items are being added to "Send To" menu.
- Source Type: Choose your equipment model.
- Target Type: TreeNode (this is in our case as we want it to show in the View TreeNode).
- Target ID: ID of your dashboard. This may be found on dashboard property menu.

Remember to commit actions before closing the edit mode and check that dashboard was added in UI References list.
Step 4: Test that settings are working
After saving all settings, we can now test that everything works by opening View and choosing one of the instances of our equipment model. We right click on top of the instance and from opening menu choose "Send To" and choose the dashboard we just added.
After opening the dashboard we should see all the widgets and instance properties within the widgets. Doing this same action from another instance in the same equipment model should do the same.
Updated 6 months ago