ABB Ability™ Secure Remote Access (Implementation)
ABB Ability™ SRA is a component built to create a secure connection to remote devices. Essentially, it solves the problem of "How do you reach and control remote devices behind a firewall and/or without direct internet connection?"
ABB Ability™ Secure Remote Access (ABB Ability™ SRA) is an independent module of ABB Ability™ History that provides secure, end-to-end remote access using OAuth2 authentication, across multiple network layers. It only needs outbound HTTPS (port 443) connections from the client and the target system. It can tunnel any TCP/IP traffic in both directions.
ABB Ability™ SRA delivers a good engineering experience, efficient tooling, easy access control, end-to-end security, and real-time auditing to ensure safe and efficient remote service management.
The key idea is to be secure and easy to use
How it works ...
In a typical setup, where a device is deep within the factory network, behind several firewalls allowing only HTTPS outbound connections up to the central monitoring system, which acts as a remote access gateway.
What happens when the user wants to make a connection to the device:
- The user first establishes a connection to the central monitoring system using a web browser. The connection gets authenticated via OAuth2.
- The user navigates in GUI to the device.
- The user right-clicks on the device and selects eg. Remote Desktop.
- A native tunnelling URL handler component gets launched on the user's computer and it establishes the connection to the central monitoring system using the same session as the user's browser.
- URL handler component checks for updated versions of itself and updates itself if necessary
- URL handler component establishes an end-to-end secure connection to the device.
- The device requests OAuth2 authentication.
- URL handler forwards this request to the browser. As we already have an OAuth2 authenticated connection to the central monitoring system user does not need to do anything, but the authentication is processed with just a slight flash in the browser window.
- The token obtained from the authentication is passed back to the device and another end-to-end secured tunnel is spawned to allow the device to make an HTTPS connection to the OAuth2 server using the User's computer as a proxy.
- Using the established verification tunnel the device verifies the OAuth2 token, the verification tunnel is closed and the already established original tunnel is now ready to serve connections for the desired protocol (eg. Remote Desktop).
- URL handler app starts up the application that uses the connection (eg. Remote Desktop) and minimizes itself.
- Once the user is finished with the task and closes the application (or the URL handler window) the session will end and all connections cut.
SETUP
Web Service (Central monitoring and remote access system)
**Software Package **
- cpmPlusVtrinRemoteAccessClientProvider
- cpmPlusVtrinServer
NOTE:Currently, the system relies on having a ABB Ability™ History database installation
The monolithic installer does not currently support installing the client provider components, so unless set up manually, only the package installer (Linux/Windows) experimental can set this node up.
Gateway Node (Optional intermediate nodes)
Software Package
- cpmPlusVtrinServer
- cpmPlusVtrinNetSync
NOTE:Currently, the system relies on having a Ability™ History database installation
Vtrin-NetSync must be configured to securely forward the part of the equipment model the remote access uses to the next level.
Vtrin-NetSync must be configured to use wss connection to connect also to local node, with other types of connections, the forwarding will NOT work.
Agent (Target device or system)
Software Package
- cpmPlusVtrinRemoteAccessPackage
NOTE:If you are running on a Windows system with the Ability™ History (monolithic installer) already installed, the software is included._
If you are on Debian Debian-based Linux system, remember that package names are case sensitive, so use all lowercase.
After installation, navigate to the installation directory
Windows:- C:\Program Files\ABB Oy\RTDB\bin
**Linux:- ** /usr/share/cpmplus/netcore on Linux
Find a file:-VtrinRaxess.config.example.json; make a copy and rename it to VtrinRaxess.config.json and edit this new file with all specific configuration parameters described below:-
Gateway address
Specify the address of the gateway (intermediate node or the central web service) server with the Gateway parameter.
Gateway: "wss://mygateway/view"
If needed, the username and password for the gateway connection must be stored in the corresponding Windows Vault (or on Linux, the campus-implemented equivalent). This can be done (on all platforms) with the command:
runcpm Vtrin-NetServer --username myuser --password mypassword --addcredentials wss://mygateway/view
Vtrin-NetServer is required
Certificate
In the configuration file, you need to provide a HTTPS certificate for the connection
The first option is a file path to the .p12 or .pfx common security format file (the file needs to have been saved with the password "vtrincert")
Certificate: "/usr/share/cpmplus/vtrincert.p12"
Or, on Windows, it can be a "friendly name" of a certificate located in the Local Computer's "Personal" certificate store (can be viewed by starting "Manage Computer Certificates" from the start menu).
The certificate "Issuer" field has to contain the correct fully qualified domain name (FQDN) of the computer correctly set "eg. CN=snack.ankkalinna.fi.abb.com". Incorrect FQDN will cause connections to fail. Ideally, the certificate should be trusted by all the clients' computers that are going to be connecting.
The current development version has a temporary setting to accept untrusted certificates as long as the FQDN matches, but that will change soon. There will be a proper way to explicitly trust the certificate so it will be more secure
A way to accept untrusted certificates will be added.
OAuth2 /Authenticate Users
To be able to use OAuth2, you need to set up the authentication provider:- Azure app registration _or _KeyCloak server and provide configuration,** ClientId** and Secret to** Vtrin Remote Access**.
| Field (Required*) | Type | Comment |
|---|---|---|
| ServerAddress* | string | OAuth2 provider configuration URL |
| ClientID* | string | OAuth2 Client Id |
| Secret* | string | OAuth2 Secret |
OAuth2Config:
{
 "ServerAddress": "https://login.microsoftonline.com/abb.onmicrosoft.com/v2.0/.well-known/openid-configuration",
 "ClientId": "aaaaaaaa-bbbb-cccc-dddd-eeeeeeeeeeee",
 "Secret": "xxxxxxxxxxxxxxxxxxxxxxxxxxxxxxxxxxxxxxxxxxxx"
}
Client
The client installation process is as straightforward as possible. Once installed, the client includes an automatic self-update feature. Every time the client starts, it checks for newer versions and downloads updates in the background, so users don't have to update it manually.
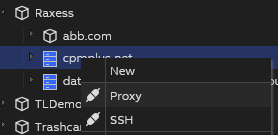
To begin a remote access session, users first navigate to the target device in the gateway web interface. By right-clicking on the device, a dialog appears, allowing them to select the tunnelling type. After choosing either Proxy or SSH (see below for more), they initiate the connection directly from the web interface.
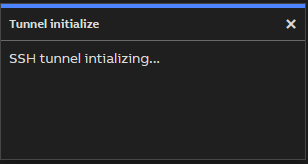
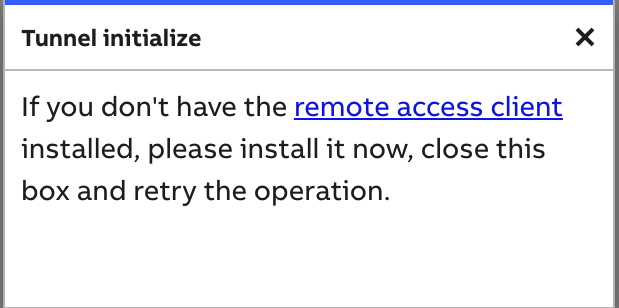
The browser will try to launch the Vtrin Remote Access URL handler. If the handler is installed, it will launch and establish a connection to the gateway. Once it creates the connection, this dialogue will close. If the handler is not detected within five seconds, the dialogue content will change and offer an option to download the client.
Supported Platform
Platform and CPU architecture are automatically detected, and the correct binary is offered. Once downloaded, the next steps depend on the user's operating system.
Windows
| Supported Architectures | WebService | Gateway Node | Agent | Client | Comments |
|---|---|---|---|---|---|
| x64, ARM64 |
Start the downloaded executable (there might be some warnings from the OS that need to be acknowledged first) and press the Install button in the appearing dialogue:
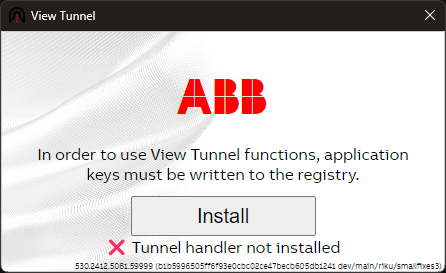
The installation will be immediate as it only requires a couple of setting changes. Admin privileges are NOT needed. After installation, close both the installation dialogue as well as the Tunnel initialize dialogue, and start opening the tunnel again. If the first time, the browser will ask you permission to start the newly installed handler. Answer "YES", and you are good to go.
Linux
| Supported Architectures | WebService | Gateway Node | Agent | Client | Comments |
|---|---|---|---|---|---|
| x64, ARM64 | The client tested only on Arch Linux x64 with KDE but should work on others as well. Gateway and Server supported on Arch Linux, Debian and compatible derivants of those |
After downloading, grant executable permission to the file (change the name if running under arm64 instead):
chmod u+x ViewTunnel-linux-x64 -
after granting the execute permission the rest of the installation goes similarly as on Windows (see above).
MacOS
| Supported Architectures | WebService | Gateway Node | Agent | Client | Comments |
|---|---|---|---|---|---|
| x64, ARM64 | In the early alpha stage a lot of issues, including:
|
MacOS installation workaround due to the application not being signed. The tunnel handler will come as a ViewTunnel-osx-x64.dmg or ViewTunnel-osx-arm64.dmg.
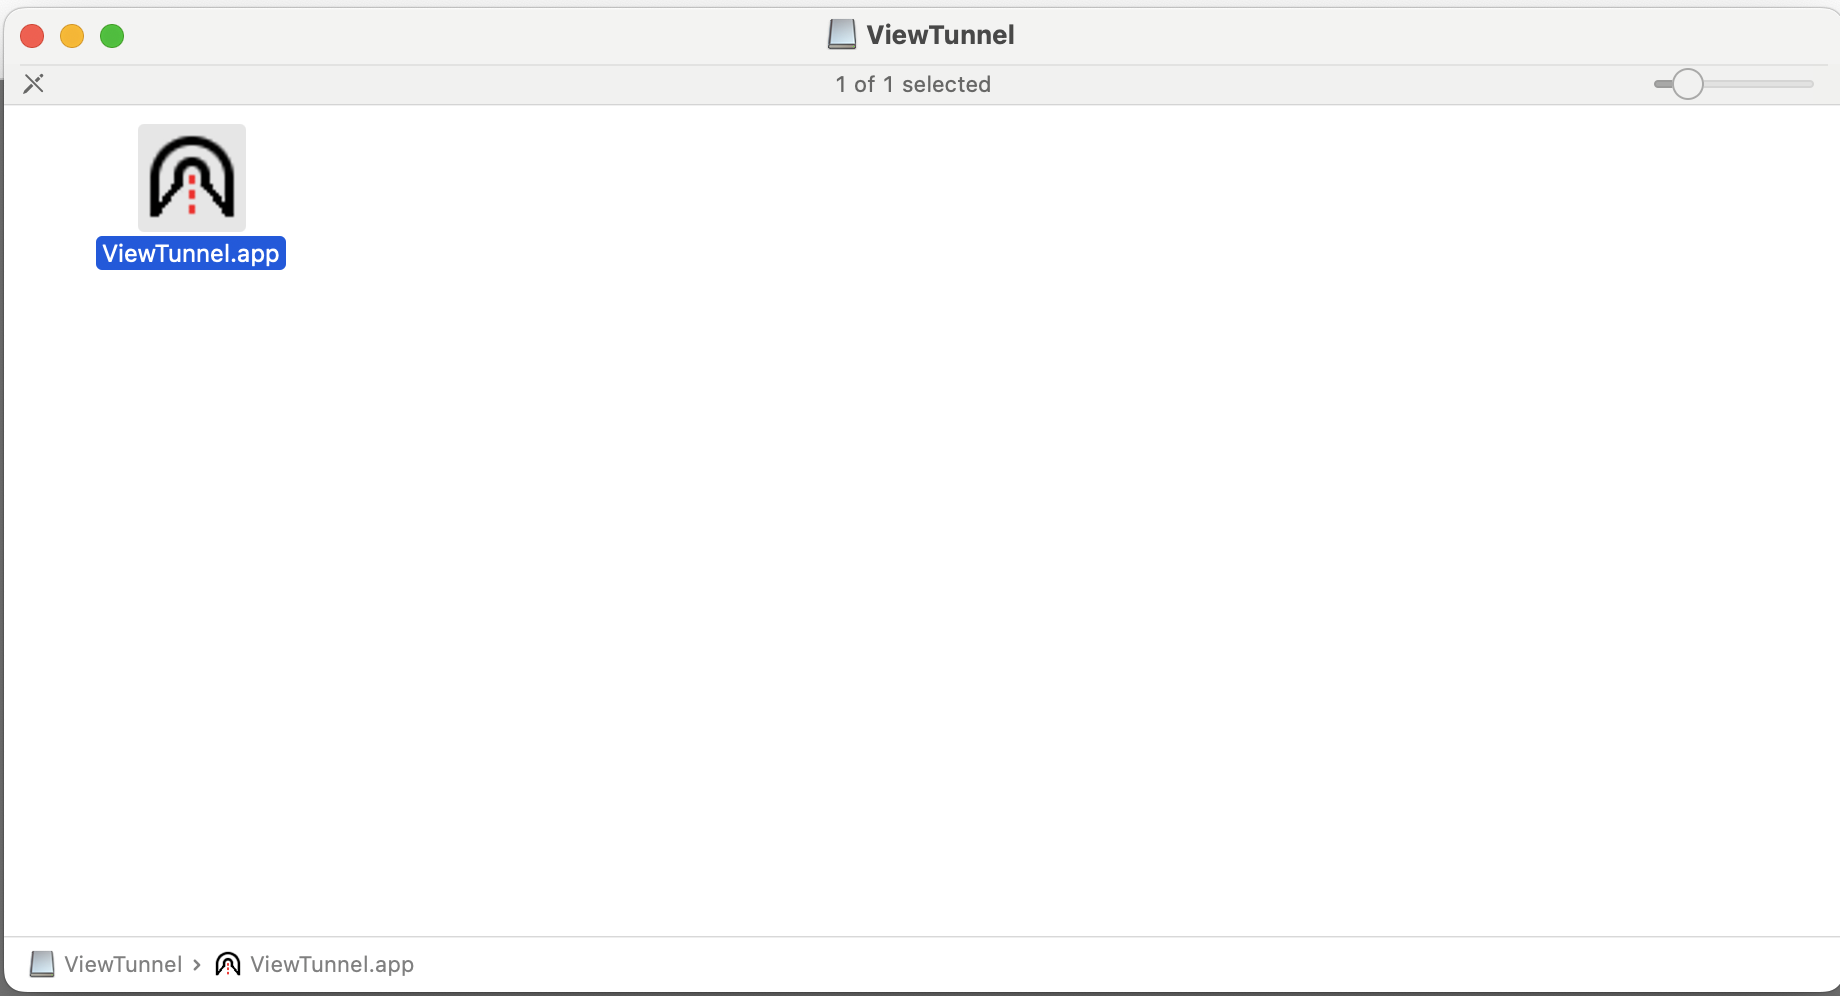
This should be opened and then the ViewTunnel.app dragged to the desired installation location. After this, you need to bypass the MacOS Gatekeeper by trying to launch the app once, pressing cancel and then going to MacOS System Preferences/Security & Privacy and pressing "Open anyway" for the ViewTunnel.
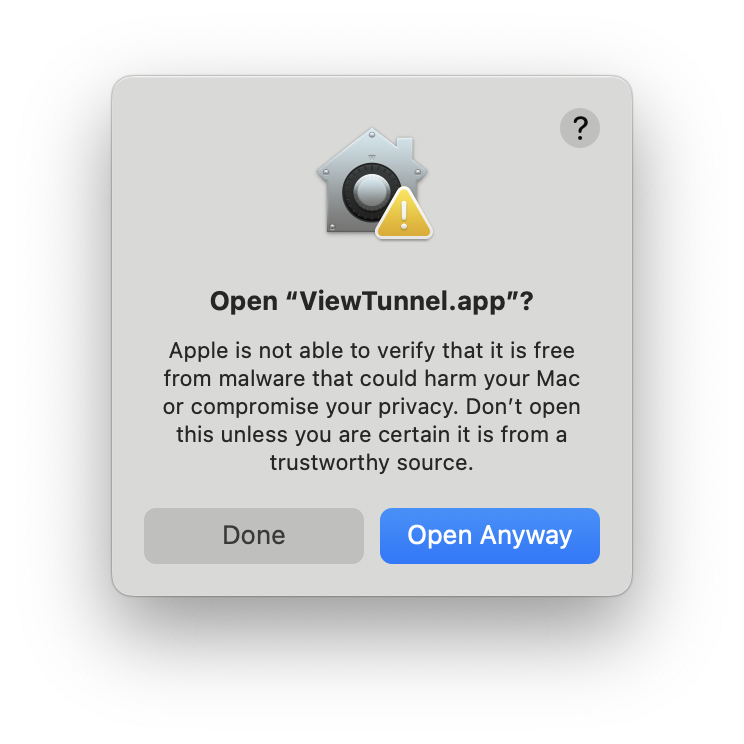
After that, on the first run, you can close the dialogue as well as the Tunnel initialize dialogue and start opening the tunnel again. For the first time, the browser will ask you permission to start the newly installed handler, answer YES, and you are good to go.
Tunnelling type
Specify ways to access the device remotely
Remote Desktop (RDP) - Windows
| Field (Required*) | Type | Comment |
|---|---|---|
| Path* | string | |
| Type* | string | Must be "RemoteDesktop" |
| Account | string | Although optional, it's highly recommended to be filled for a better user experience and to avoid sharing credentials. If the missing, remote desktop will ask for the username, |
| AllowedUsers/Group* | string | The array of strings listing the OAuth2 user or group names that are allowed to access this tunnel. When configuring the ssh user to work without separate authentication, you need to add the private key to the configuration and the public key to the ~/.ssh/authorized_keys. Always create a separate key for Vtrin Remote Access users, never share the key or use the same key for anything else. When adding to the authorized_keys, for maximum security always prefix the key with the target node, so eg. in case it is for localhost access from="127.0.0.1,::1" to prevent it from being used from elsewhere in the local network: |
{
  "Path": "Raxess.cpmplus.net",
  "Type": "RemoteDesktop",
  "Account": "RDPAdmin",
  "AllowedUsersOrGroups": ["ABB\\cpmPlus-Contributors"]
}
SSH
SSH has its own encryption and authentication, but it is supported as it is the de facto standard for console access. SSH can be configured so that it needs no second authentication in addition to the tunnel.
| Field(Required*) | Type | Comments |
|---|---|---|
| Path* | string | |
| Type* | string | Must be "SSH" |
| TargetHost | string | If null, empty or missing, the value "localhost" is used. |
| Port | integer | If missing the SSH default port (22) is used |
| Account | string | Although optional, it's highly recommended to be filled for a better user experience. If missing, ssh will ask for the username, |
| ServerKey | string | If null, empty or missing, the correct value will be automatically detected. |
| UserKey | string | Although optional, it is highly recommended to be filled for a better user experience and to avoid sharing credentials. This key should be set up so that it can only be used from the target node (see documentation below). |
| AllowedUsers/Groups* | string array | An array of strings listing the OAuth2 user or group names that are allowed to access this tunnel. |
{
  "Path": "Raxess.cpmplus.net",
  "Type": "SSH",
  "TargetHost": "localhost",
  "Port": 12345,
  "Account": "myuser",
  //"ServerKey": "ssh-ed25519 AAAAC3NzaC1lZDI1NTE5AAAAII17A8/Cwm0ZL7bseXoawtTZxSM3fbv8xoHYtIZcT0ja",
  "UserKey": "
      -----BEGIN OPENSSH PRIVATE KEY-----
      xxxxxxxxxxxxxxxxxxxxxxxxxxxxxxxxxxxxxxxxxxxxxxxxxxxxxxxxxxxxxxxxxxxxxx
      xxxxxxxxxxxxxxxxxxxxxxxxxxxxxxxxxxxxxxxxxxxxxxxxxxxxxxxxxxxxxxxxxxxxxx
      xxxxxxxxxxxxxxxxxxxxxxxxxxxxxxxxxxxxxxxxxxxxxxxxxxxxxxxxxxxxxxxxxxxxxx
      xxxxxxxxxxxxxxxxxxxxxxxxxxxxxxxxxxxxxxxxxxxxxxxxxxxxxxxxxxxxxxxxxxxxxx
      xxxxxxxxxxxxxxxxxxxxxxxxxxxxxxxxxxxxxxxxxxxx
      -----END OPENSSH PRIVATE KEY-----
  ",
  "AllowedUsersOrGroups": ["ABB\\cpmPlus-Contributors"]
}
When configuring the SSH user to work without separate authentication, A private key needs to be added to the configuration, a public key and the ~/.ssh/authorized_keys. Always create a separate key for Vtrin Remote Access users; never share the key or use the same key for anything else. When adding to the authorized_keys, for maximum security, always prefix the key with the target node, so eg. in case it is for localhost access from="127.0.0.1,::1" to prevent it from being used from elsewhere in the local network:
from="127.0.0.1,::1" ssh-ed25519 AAAAC3... VtrinRaxess@localhost
To generate the keys, you can run the following commands on the user account you have configured to be used:
ssh-keygen -t ed25519 -f vkey -N "" -C VtrinRaxess@localhost echo from=\"127.0.0.1,::1\" $(cat vkey.pub) >>~/.ssh/authorized_keys cat vkey rm vkey vkey.pub
Then, copy-paste the private key that was dumped on the console to the "UserKey" field of the configuration. If ~/.ssh/authorized_keys not found, you might have to create it yourself:
mkdir ~/.ssh chmod 700 ~/.ssh touch ~/.ssh/authorized_keys chmod 600 ~/.ssh/authorized_keys
Proxy
Proxy provides a_ http/https/SOCKS4/SOCKS5_ proxy, which access can be limited to configured hosts/ports. It can be utilized for providing proxy access to anything from a single web page to the entire network.
| Field (Required*) | Type | Comment |
|---|---|---|
| Path* | string | |
| Type* | string | Must be a "Proxy" |
| Startpage | string | Optional start page URL |
| Whitelist* | string array | The array of wildcard strings with "hostname: port" values. You can use wildcards _ and ? anywhere within the strings. Specifying "*" enables full access to the entire network. |
| AllowedUsersOrGroups* | string array | The array of strings listing the OAuth2 user or group names that are allowed to access this tunnel. |
{
  "Path": "Raxess.cpmplus.net",
  "Type": "Proxy",
  "StartPage": "https://www.contoso.com",
  "Whitelist": ["10.58.44.*:443", "*.mysubnet.contoso.com:443"],
  "AllowedUsersOrGroups": ["ABB\\cpmPlus-Contributors"]
}
Proxied Browsing Support
| Browser | Supported | Tested | Comments |
|---|---|---|---|
| Avast Secure Browser | |||
| Brave | |||
| Chrome | Currently only supported browser on Mac OS X | ||
| Chromium | |||
| Edge | |||
| Falkon | Falkon does not support setting a custom proxy for one instance and thus cannot be supported | ||
| Firefox | Supported, but using a temporary custom profile, so users cannot see their bookmarks and other settings | ||
| Icecat | Supported, but using a temporary custom profile, so users cannot see their bookmarks and other settings | ||
| Konqueror | Needs more testing to be sure that it works as this is not a Chromium/Firefox-based browser | ||
| Maxthon | |||
| Opera | |||
| Safari | Safari does not support setting a custom proxy for one instance and thus cannot be supported | ||
| Seamonkey | Supported, but using a temporary custom profile, so users cannot see their bookmarks and other settings | ||
| Vivaldi | |||
| Waterfox | Supported, but using a temporary custom profile, so users cannot see their bookmarks and other settings | ||
| Yandex-browser |
Browsers marked Supported, but not tested are verified by internet sources to work the same way as Chromium or Firefox. Thus most likely working fine, except Konqueror, which has support, but needs more careful testing as it is neither Chromium nor Firefox-based.
Updated 9 months ago