Dashboard scripting
Provides detailed documentation in using scripting in View Dashboards
1. Add a sample dashboard script
Utilizing scripting in View empowers Ability History users to engage with View APIs through JavaScript.
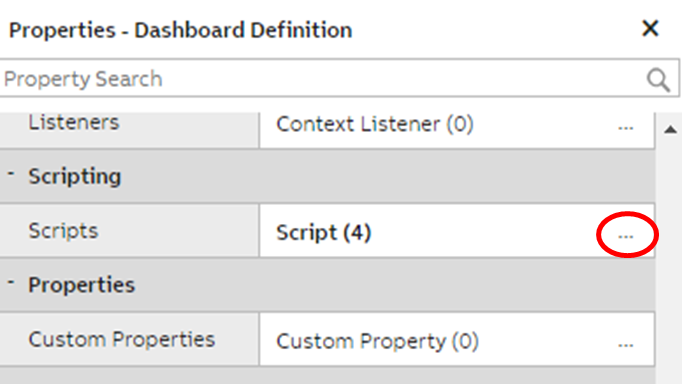
To add scripts, navigate to the Scripting properties section within the View Dashboard. Users can access the script popup by clicking on the ellipses, as depicted in the screenshots below.
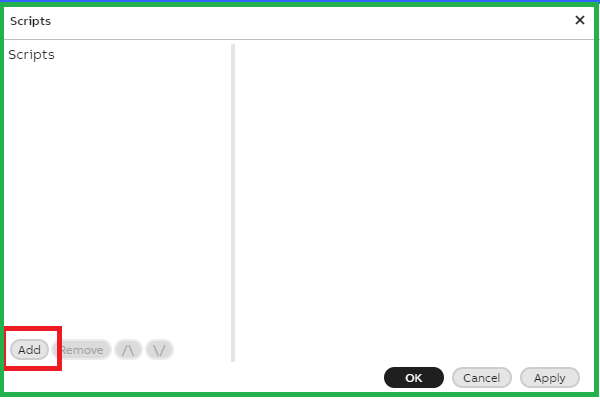
Click the "Add" button in the script popup to introduce a new script. An empty script is added, as illustrated below. Users can add multiple scripts to a single dashboard for enhanced customization.
Scripts can be triggered by various Event Sources, with the Dashboard set as the default source.
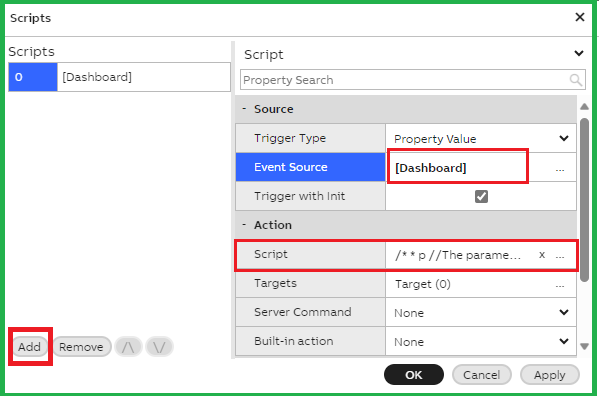
To exemplify, let's craft a sample script. Click on the ellipses in the Action section to access the JavaScript editor popup with default parameters. Additionally, insert a straightforward JavaScript console log message to verify the scripting functionality. Save the script by clicking "Apply" and close the popup with "Ok." Confirm by clicking "Ok" in the Scripts popup, and then save and close the dashboard.
console.log("This is for testing Dashboard scripting !");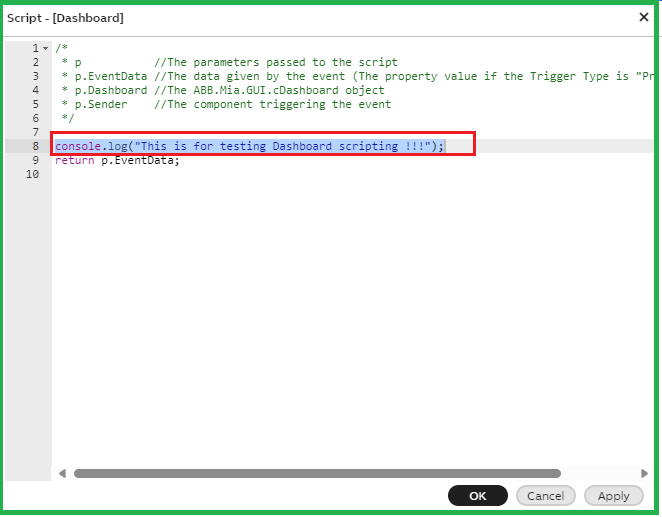
Now, open the browser's developer tools and navigate to the Console tab, as shown below. Open the scripted dashboard to observe the console log added in the script within the browser console.
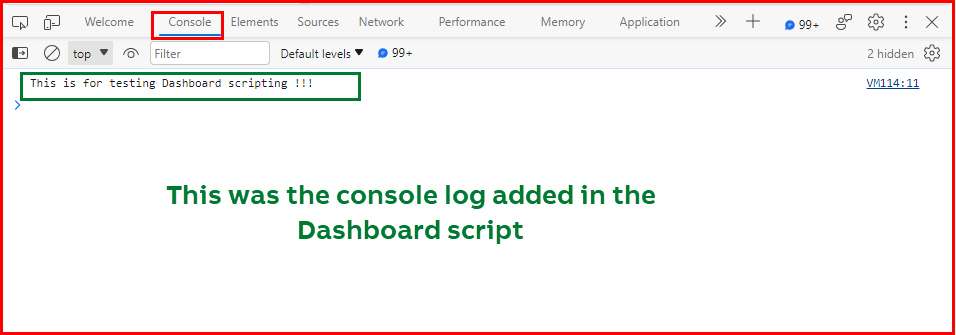
Here is an animation of the above steps.
2. Scripting using Button click event
Let's craft an illustrative script to manipulate the value of a label widget by responding to button click events. Begin by creating a new dashboard and incorporating a Label widget named 'Info Label' with the default text set to 'Info.' Include two button widgets, named 'Reset Button' and 'Set Default Label Button.'
Now, access the Dashboard properties to create scripts with the following specifications:
Script 1: Reset Label Value on Button Click
Trigger Type: Event
Event Source: Reset Button
Event: Clicked
Script:
return ""; // Returns an empty string, clearing the label textTarget:
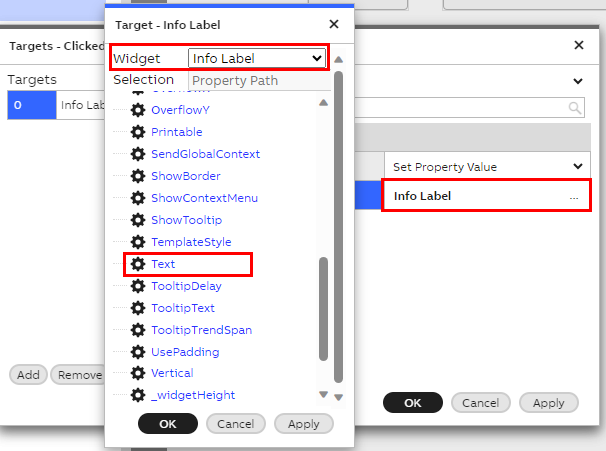
Clicking on the ellipses opens a popup. Add a new target by clicking on the Target ellipses.
Select the widget as 'InfoLabel' and choose the Text option of the Label widget.
Script 2: Set Default Value on Button Click
Create another script from Dashboard properties and Add a new script with below details.
Trigger Type: Event
Event Source: Set Default Label Button
Event: Clicked
Script:
return "Info"; // Returns the default value 'Info' when the user clicks 'Set Default Label Button'Target:
Clicking on the ellipses opens a popup. Add a new target by clicking on the Target ellipses.
Select the widget as 'InfoLabel' and choose the Text option of the Label widget.
Save and close the dashboard. Clicking on 'Reset Button' clears the Label widget, while clicking on 'Set Default Label Button' sets the label widget with the value 'Info.'
3. Clear Select and Single Property Editor widgets
Purpose:
- These scripts facilitate the clearing of Select and Single Property Editor widgets with the click of a reset button. This functionality is particularly useful when a user needs to remove a selection and eliminate any remnants of previous choices.
Create and configure widgets:
- Begin by adding a Select Widget, Single Property Editor Widget, Class Instance Widget, and a Button Widget to the dashboard, assigning appropriate names to each.
- Specify the data source for the Select Widget and the Class Instance Helper Widgets (e.g., selected Path_GENERATOR).
- In the Select Widget, enable "Listen to Context" for the Class Instance Widget.
- Configure the Class Instance Widget properties, selecting "Commit Button" and ensuring the "Make editable" checkbox is checked.
- Utilize Property Reference to link to a specific instance of DB Instance from the properties of the Single Property Editor.
Scripts:
- Trigger Type: Event
- Event Source: Reset button (previously added to the dashboard)
- Event: Clicked
- Target: Class Instance Widget => Instance and Target: Select Widget => Selected Item
- Script: return null; // This effectively resets both the Select Widget and the Class Instance.
Additionally, add another target to reset the Single Property Editor as well.

4. Value widget Hide on Zero value
Purpose:
These scripts facilitate hiding the value widget if value is falling down to 0.
Create and configure widgets:
- Begin by adding a Value Widget to the dashboard.
- Specify the data source for the Value Widget to Variable name which updated constantly
Scripts:
- Trigger Type: Property Value
- Event Source: Value1.ValueAccessor.Value
- Target: Value1.Container.IsHidden (Action : Set Property Val)
Script:
return p.EventData === 0;5. Click Button and Button name on Label
Purpose:
This Script facilitate when click on Button, on label which button is clicked is displayed.
Create and configure widgets:
- Add Button1 widget and label 1 widget
Scripts:
- Trigger Type: Event
- Event Source: Button1
- Event: Clicked
- Target: Label1.Text (Action : Set Property Val)
return p.Sender.Get("Text") + " clicked!";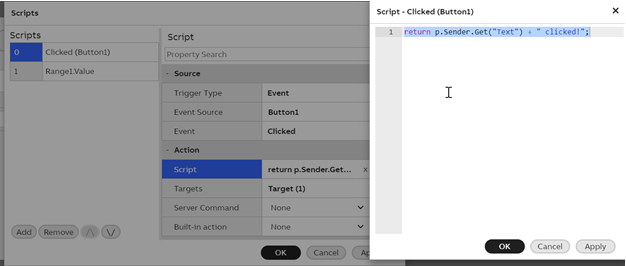
6. Color panel changes border width on selection of range
Purpose:
This script facilitate Color Panel border width takes value from range1. Border color will take from property editors to differentiate border width.
Create and configure widgets:
- Add Range1 widget, Add Panel (ColorPanel), Single Property editor1 , Single Property editor2.
- Go Single Property editor1 and add Property Reference : ColorPanel.Background.Color.
- Single Property editor2 and add Property Reference : ColorPanel.BorderColor
Scripts:
- Trigger Type: Property Value
- Event Source: Range1.Value
- Trigger with Init : True
- Target: ColorPanel.BorderLineWidth (Action : Set Property Val)
return p.EventData;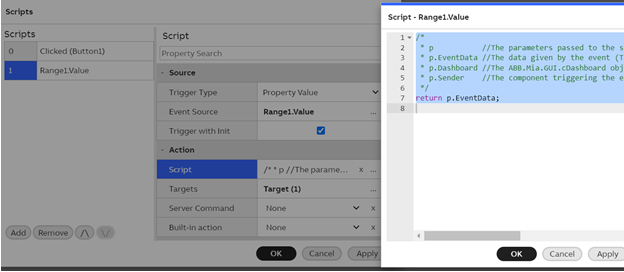
7. Change background transparent and green
Purpose:
Change label’s background based on Variable’s value shown in Value-widget
Create and configure widgets:
- Create button-, label- and Value-widgets. Name them properly. Widget Name in the script must be replaced with the name of the widget, which value is wanted
Scripts:
- Trigger Type: Event
- Event Source: Value-widget
- Event : Value changed or Property changed
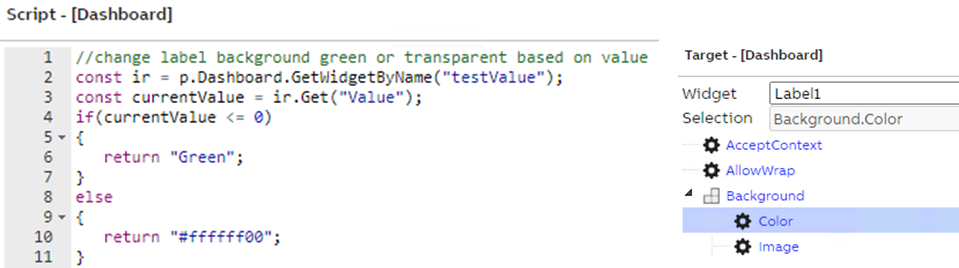
- Target: Label -> Background -> Color
//change label background green or transparent based on value
const ir = p.Dashboard.GetWidgetByName("WidgetName");
const currentValue = ir.Get("Value");
if(currentValue <= 0)
{
	return "Green";
}
else
{
	return "transparent";
}
8. Count data list items and show them in label
Purpose:
To count how many rows there are in the data list and show the amount in a label.
Create and configure widgets:
- Create Data list and label
Scripts:
- Trigger Type: Event
- Event Source: Data List1
- Event: DataFetched
- Target: Label -> Text
return p.Sender.Iterator.FullRowCount.toString();
9. Show a notification or error message
Purpose:
To send messages in the left corner. Like when you save the dashboard. You can write your own message inside the brackets
Scripts:
- For notification, put in the script:
ABB.Mia.Notification.ShowMessage("Message to be shown"); - For error message, put in the script:
ABB.Mia.Notification.ShowError("Error message to be shown");


Updated 6 months ago